


There are several ways to interact on Facebook beyond just having your own personal profile. The two main ways are via a Group (see our guide on creating a group on Facebook) or as a Page.
A Page is usually used by a business, organisation or public figure as a showcase. Anyone can create a Page, but only official representatives can create a Page for an organisation, business, brand or public figure. For instance, if you are a fan of a certain singer, group or artist then you might want to create a page with all the things that you really like about them. This would then be a Page about them but not created by them.
Some Pages and profiles have been verified by Facebook to let people know that they're authentic:
A blue badge on a Page or profile, means that Facebook has confirmed that this is an authentic Page or profile. Not all public figures, celebrities and brands on Facebook have blue badges.
If you see a gray badge on a Page, it means that Facebook has confirmed that this is an authentic Page for this business or organisation.
This guide will show you how to create a Facebook page.
Step 1: Create a page
There are two ways to create a page - click on Create a Page on the log in page where you enter your sign in information.
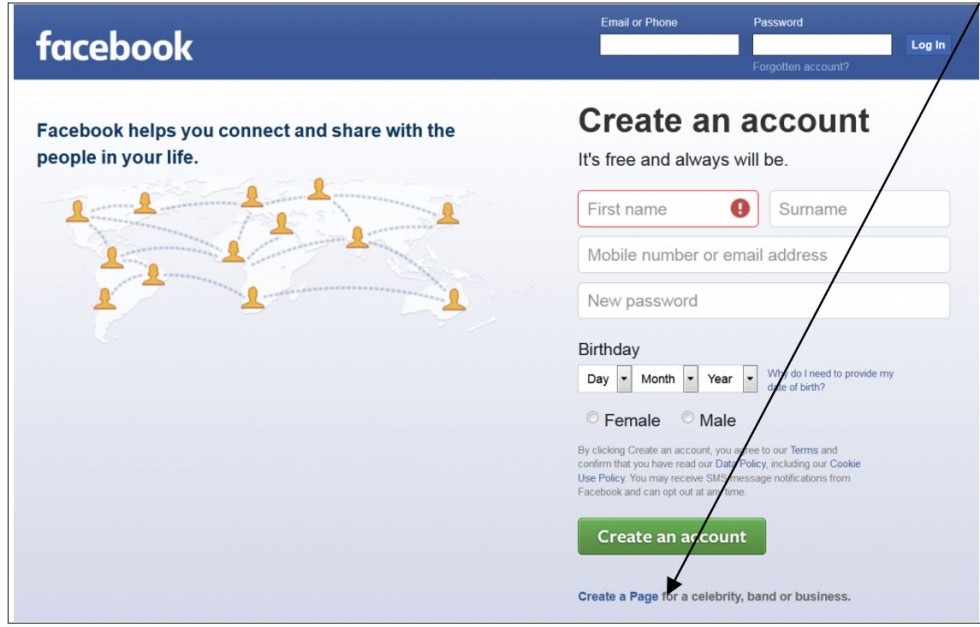
You can also click on Create a Page in the menu on the left hand side of your profile.
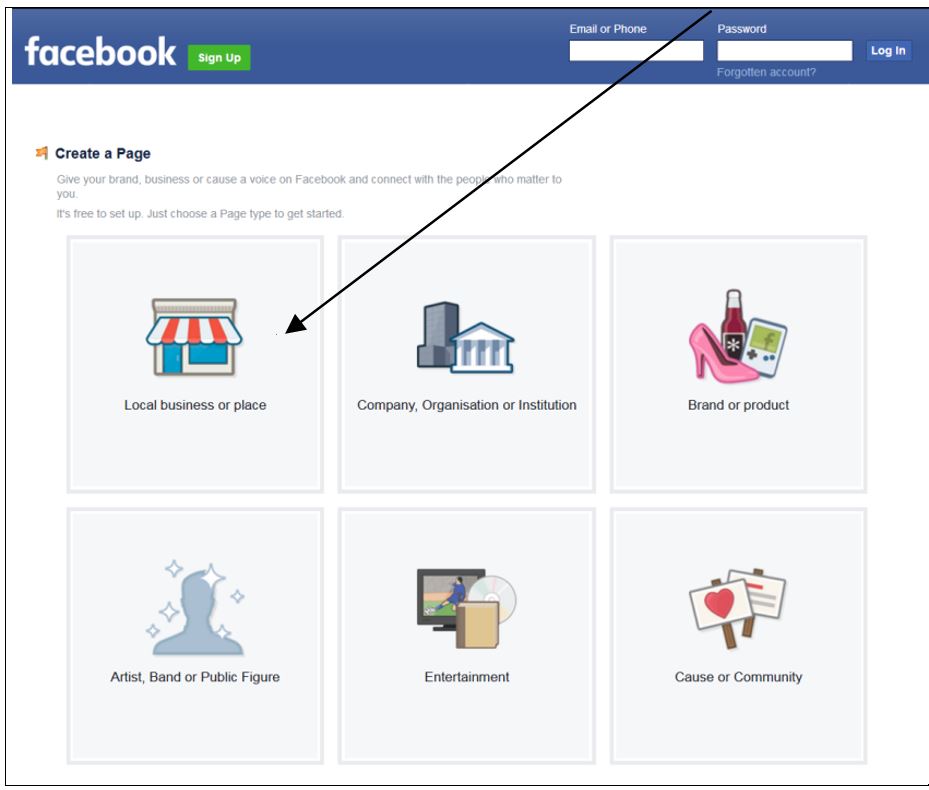
Once you have clicked on this a new window will open asking what category you would like to put your new page into.
The choices are:-
- Local Business or place
- Company, Organisation or Institution
- Brand or Product
- Artist, Band or Public figure
- Entertainment
- Cause or Community
Part 2: Choose a category
For this example we have chosen Local Business or Place. Click on the button.
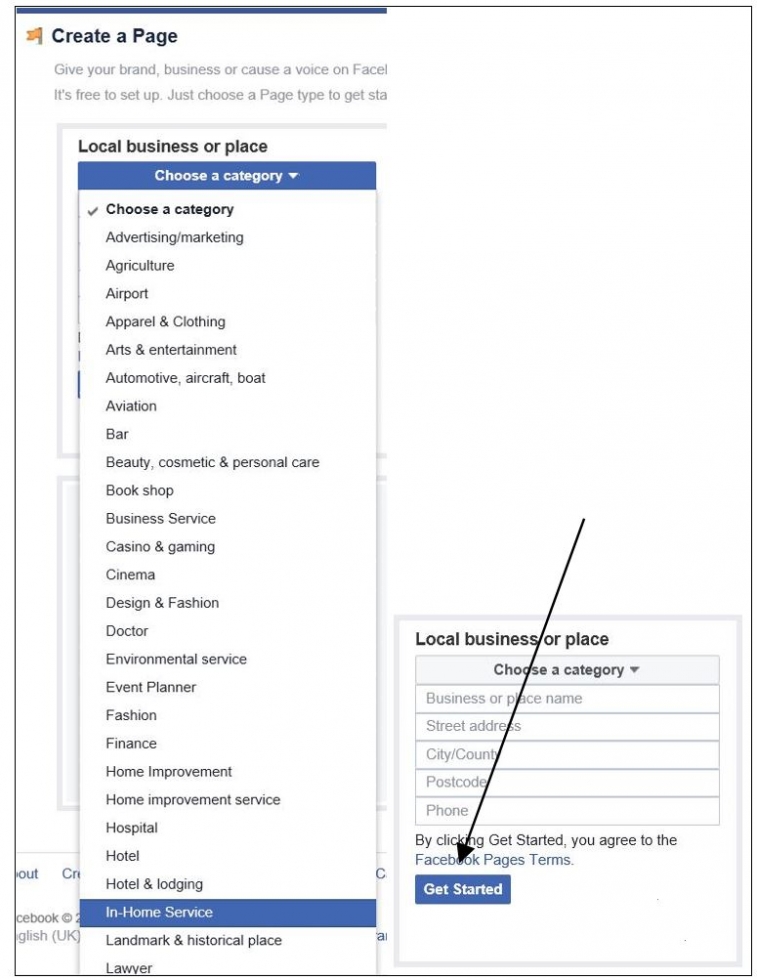
A drop down menu will ask you to select a description that best suits your business or place. Each of the categories above will also give you a choice. You must also enter your contact details and then click on Get Started.
Part 3: Add a cover and profile photo
Your new page will open ready for you to add a Cover Photo and a Profile photo (you may wish to make this a logo or a club crest).
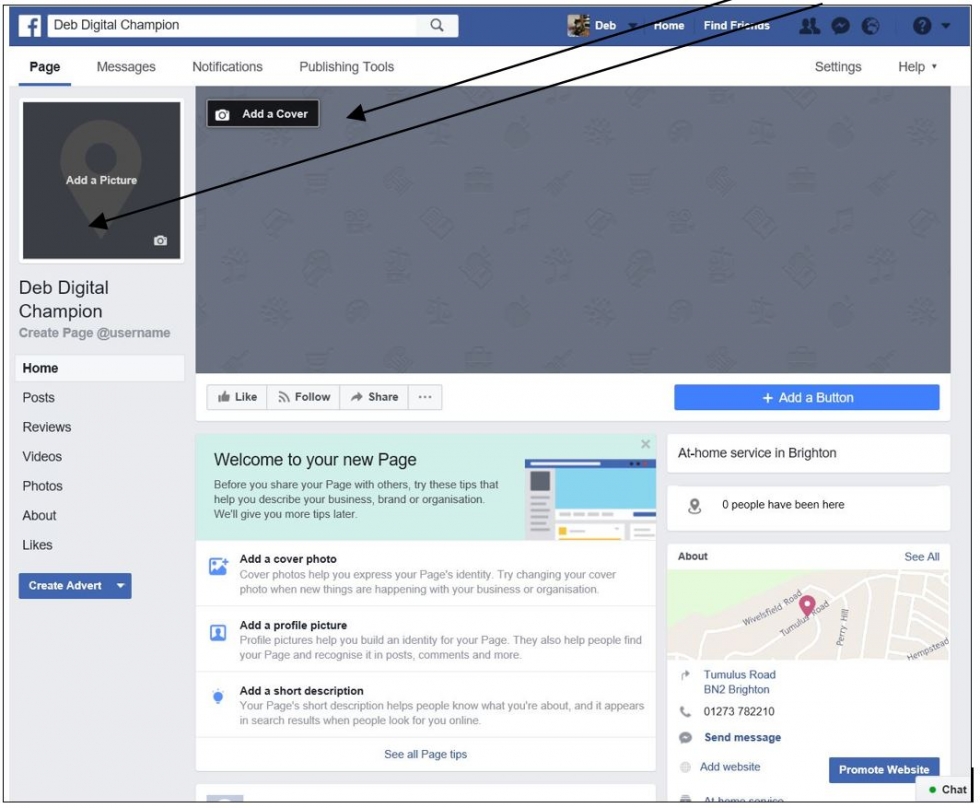
To add a new Profile picture click on Add a Picture. You will have a choice of taking a photo (assuming you have a built in camera in your laptop or tablet) or of uploading a picture.
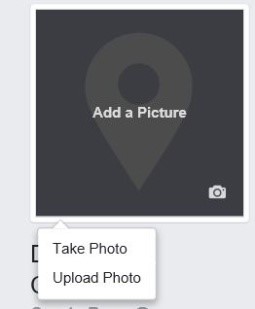
If you choose Upload Photo a new window will open directing you to where you store photos on your computer. Click on the image you would like to use.

Part 4: Reposition the photo
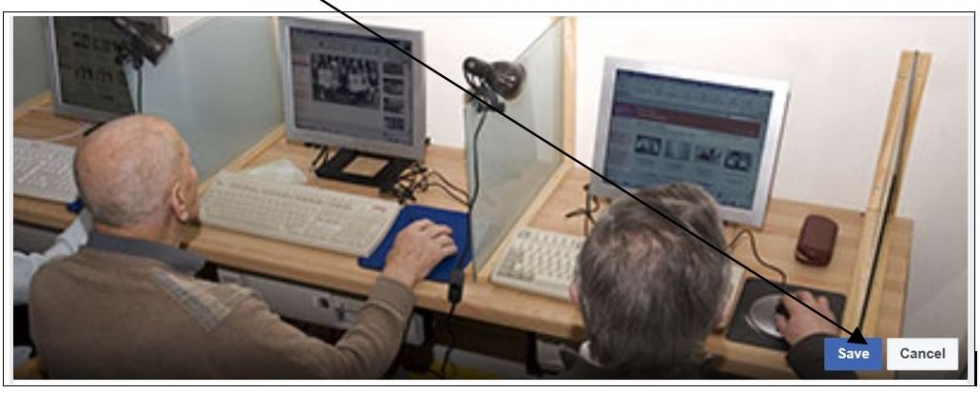
The image will appear in the window with an option to move it within the frame so that it shows the parts that are most important to you. Click and hold down the image when you see a message that says Drag to Reposition.
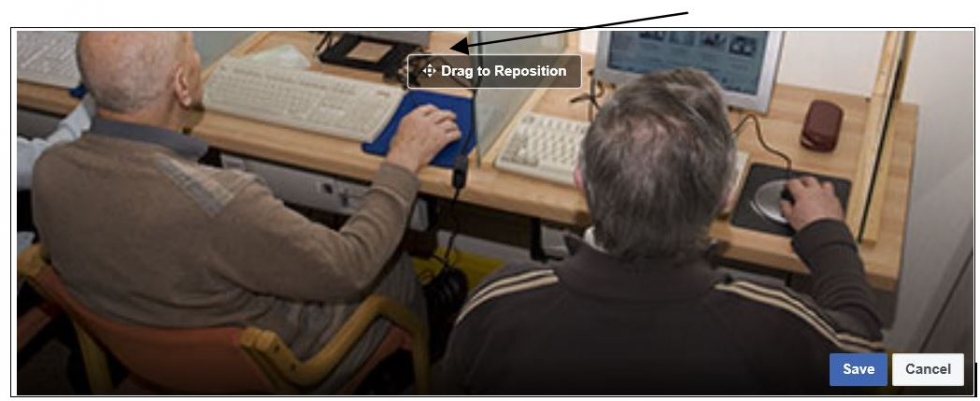
In this case the image concentrates more on the monitors in front of the learners rather than on the back of their heads! Once you have your photographs as you want them click on Save.
Step 5 : Add a description for your page
Once you have saved your photos you will receive a Welcome message. Facebook suggests that you add a description of what the page is for such as services you offer or things that you are interested in.

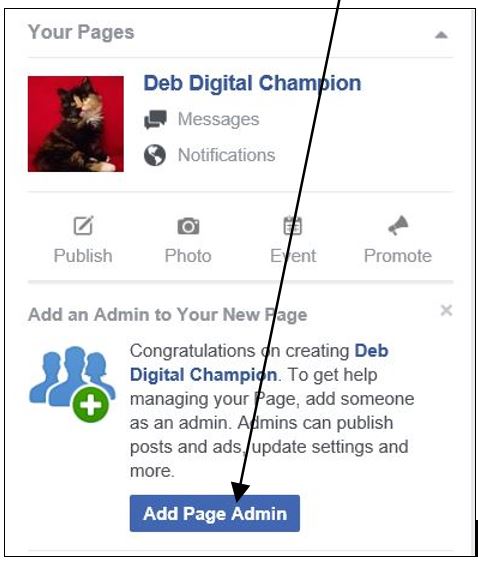
Step 6: Add a page admin
If your page is for business or for anevent it is a good idea to have someone else share the duties of keeping information and posts up to date, answering queries or posting news updates. In order to do this you have to make someone an Admin this will give them the same access as you.
You can add images, links to websites and any other information you think will be of interest to people looking at your page.
Remember you should keep your content interesting and current in order to get people to visit!
We hope that this guide has helped you to create a page on Facebook, why don't you check out some of our other Facebook guides in the Next Steps links below.