


Buying train tickets online is easy and quick. You will see the same train tickets online as you would be offered if you went to the ticket office at a station. You can often print your train ticket out at home or at work, get them sent in the post to you, collect your tickets from the ticket machines at the station or even have your ticket delivered to your smartphone (where available).
Buying online reduces the time you will need to spend in the station because you don’t need to queue up to buy your tickets from the ticket office. Plus if you set up an account online then you can often quickly and easily buy the same tickets for a regular journey and you may even receive a journey pack with all the information you need to make your journey as smooth as possible.
In this guide, we are using CrossCountry trains as our example of a train company website. All train ticket retailers sell the same fares (except for a few special promotions so do check the website of the train company with which you will be travelling).
This post was written on behalf of CrossCountry with editorial supervision from Digital Unite.
This guide is based on a PC running Windows 7 and Internet Explorer 8, but the steps are similar for Mac users or if you’re using a different browser.
You’ll need:
- A computer, tablet or smartphone with an internet connection
- A debit or credit card for payment.
Follow these step-by-step instructions to buy a train ticket online
Step 1: Go to the CrossCountry trains website (clicking this link will open the CrossCountry website in a new window).
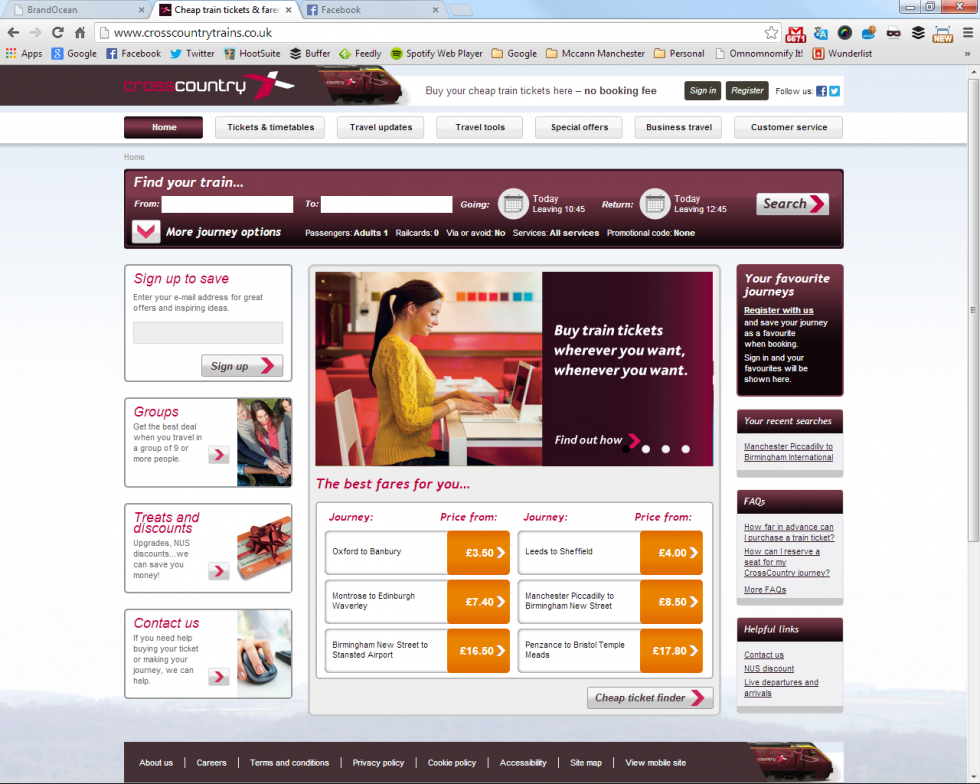
Step 2: Near the top of the page there is a panel that is called ‘Find your train…’ where you can start to fill in the details of the journey you’d like to make.
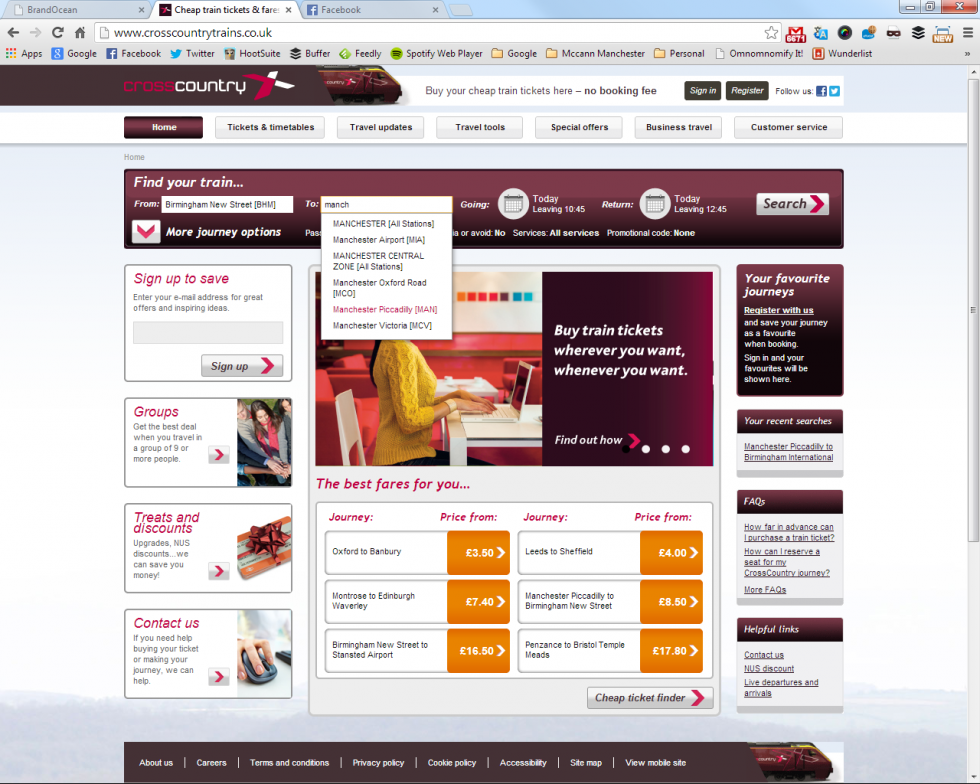
Move your cursor to the ‘From’ box until it becomes a text pointer rather than an arrow, then click in the box. This will allow you to type the name of the station you want to travel from into the box. Do the same for the ‘to’ box.
As you type the station name you will see a list of possible stations appear below the box. You can either continue to type the station name in full or you can use the mouse to click on the station name for which you’re looking.
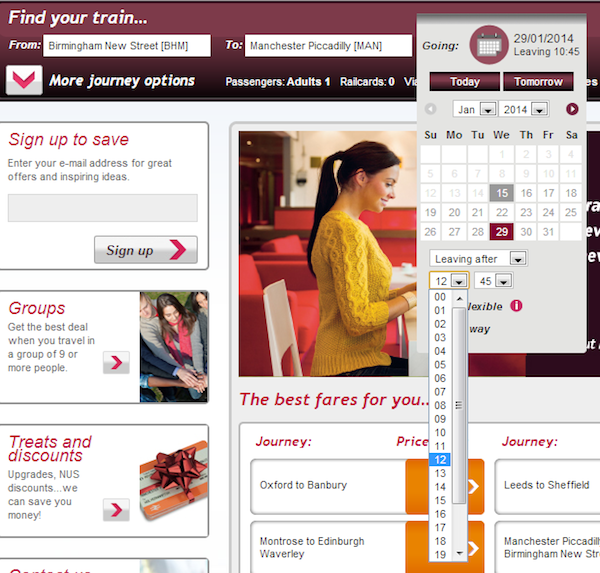
Step 3: Next to the ‘to’ box is the word ‘Going’ with a calendar icon. Right click on the icon and the calendar view will appear. Here you can select the date and time you’d like to travel and select ‘One-way’ if you don’t need to see options for your return journey. You can do exactly the same for the return journey (if you’re coming back) by clicking on the ‘Return’ calendar.
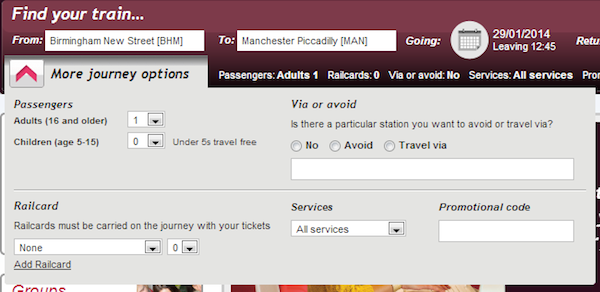
Step 4: If you would like to buy tickets for more than one person, if you have a Railcard, or if you want to travel via or avoid a particular station on your journey, then you can make these selections by right clicking on the ‘More journey options’ arrow that sits underneath the ‘From’ box.
Once you have made all your selections you can right click the Search button on the right hand side of the Find your train panel.
Step 5: The results of your journey search are displayed in a matrix. Here you can hover your cursor over each journey and fare to see more information and select the journey and ticket you want to buy by right clicking your cursor in the radio button. You can also expand the options to show more fares although the cheapest fares are always displayed at the top to speed up your booking.
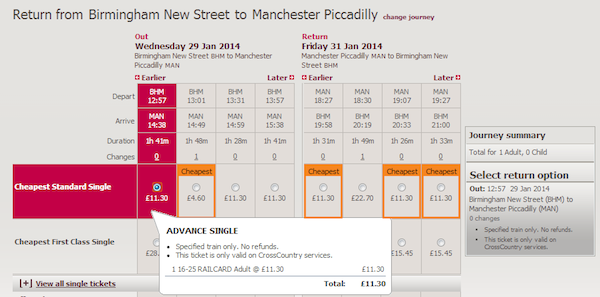
When you select a ticket, the details appear on the right hand side of the results matrix in a ‘Journey Summary’. You can change your selection by right clicking another ticket or time journey in the matrix. When you have selected both the outward and return options (or just the outward if you’re not coming back) then a ‘Next’ button will appear in the ‘Journey Summary’. Select Next once you are happy with your choices.
Step 6: The next page allows you to select different ‘Travel Options’ like upgrading to First class (if available), choosing what type of seat you’d like, buying a PlusBus ticket and requesting assistance with your journey. Once you have made those selections where relevant, click the pink Continue button at the very bottom of the page.
Step 7: Now you will need to confirm how you want to receive your ticket. Different options will appear depending on what type of ticket you have selected and how long it is before you are travelling. If you are travelling tomorrow then the First Class post option won’t appear, for example. Each option will have different questions for you to answer or fill in. Try selecting each radial button to see what appears below. If you select the ‘Self-service ticket machine’ option, for example, then you are asked to choose the station where you would like to collect your tickets from the machine and to provide an email address so that you can be sent information about retrieving your ticket.
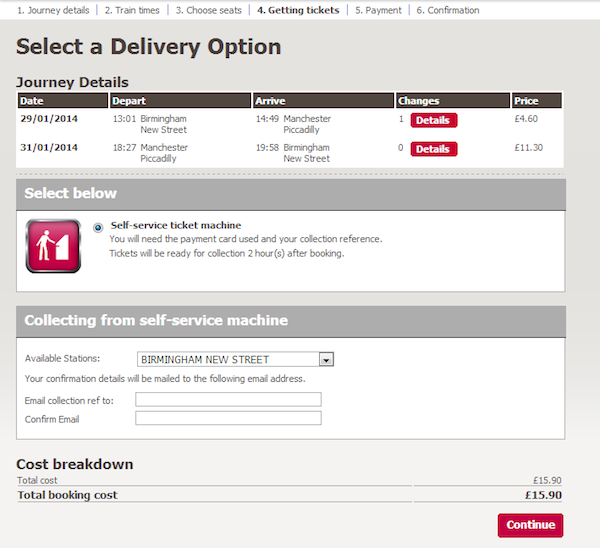
If you select First class post then you are asked to fill in your name and address.
Once you have selected the option that’s right for you, just right click the Continue button.
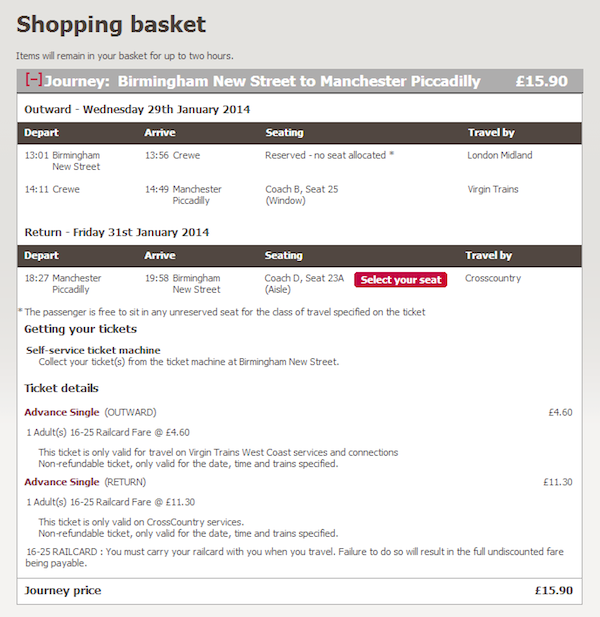
Step 8: The next ‘Shopping basket’ page confirms your journey details, how you are collecting your tickets and what type of tickets you are booking. If anything is incorrect then you can remove the journey from your basket and start again or use the ‘back’ button on your browser window to go back a step.
On this page you can also ‘select your seat’ if you’ve chosen a CrossCountry Advance ticket. Right click on the pink select your seat button next to the journey details. A new page will appear displaying a view of the train with the seat you have been allocated already highlighted pink with a pink dot in the centre. You can select an alternative seat by right clicking in another seat that is not greyed out. The greyed out seats have either been reserved by other passengers or are un-reservable. You can choose to sit in a different coach by selecting the lettered coaches at the top of the page. Once you are happy with your choice you should click on the Confirm button at the bottom of the page or Cancel if you don’t want to change seats. You will be returned to the ‘Shopping basket’ page.
Step 9: You will need to read the terms and conditions and National Rail Conditions of Carriage and click in the box to confirm you agree to these before buying.
If you want to receive information about CrossCountry offers and news then the box under the terms and conditions is automatically ticked. If you don’t wish to hear from CrossCountry then un-tick that box just by clicking on it.
Step 10: You will be asked to pay for your train tickets on the next page by entering your card details and billing address.
Step 11: Your payment card type might require further verification. This is usually a password or code you have set up with the bank card previously. If you are at all unsure about the verification process then you can visit or call your bank to set this up. Some payment cards do not require this verification.
Step 12: Once your card details have been accepted then you’ll receive a booking confirmation screen that summarises what tickets you have bought, which journey you are booked on, and the total booking cost. Here you can print the details, have the details texted to you and even save the journey as one of your favourites when you go on to create an account with CrossCountry. You will also receive an email confirmation of all the details including how you have selected to receive your tickets.
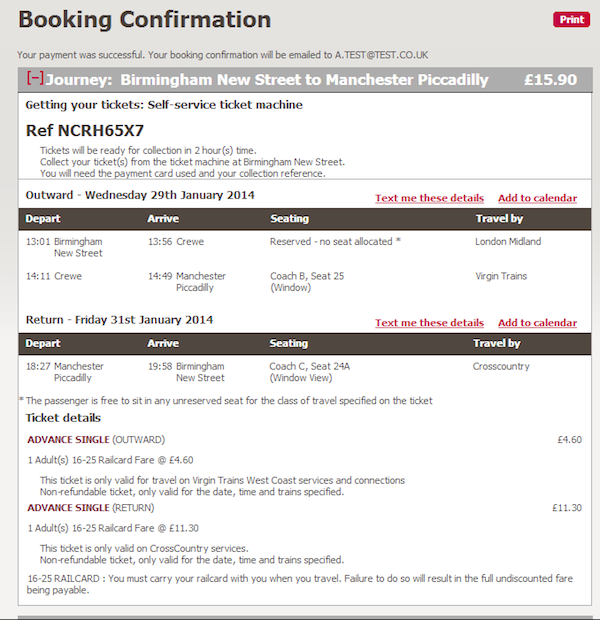
Once you have your tickets you are ready to travel and you’ve saved time by buying now rather than queuing at the station – congratulations!
Updated June 2023