


There are a many websites that will allow you to create your own blog. Blogger, the blogging platform owned by Google, is simple and free to use.
You’ll need:
- a computer with an internet connection
- an email account set up and ready to send and receive emails.
Follow these step-by-step instructions to start a blog
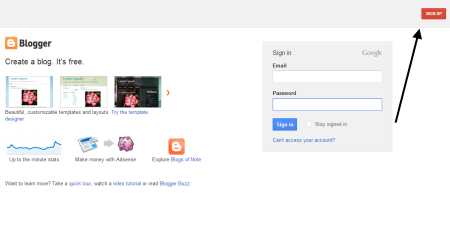
Step 1: Go to Blogger and click Sign Up or if you have a Google account, sign in with your email address and password and then click Sign in.
Step 2: Type in your email address, which must be for a current and active account. If you have a Google email address (Gmail), you should ensure that you’re already logged into this. If you do have a Gmail account, you can skip to Step 4.
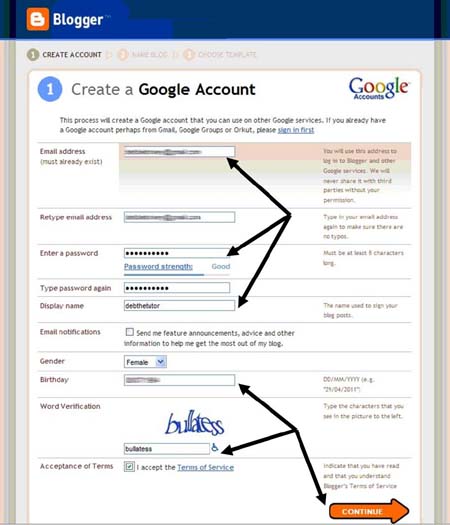
Step 3: Choose a password that you can easily remember, has at least eight characters and will be secure (not easy to guess). If you can incorporate numbers and letters, that will make it more secure. The strength of your password will be rated when you’ve typed it in.
Step 4: Type in your ‘display name’. This is the name that you want people to see. It can be your real name or a nickname.
Step 5: Type in your date of birth.
Step 6: In the box provided, type what you see in the CAPTCHA image – the randomly generated sequence of numbers and letters that must be copied accurately. It will tell Blogger that you’re a human and not a machine set up by spammers.
Step 7: Tick the box to accept the ‘Terms of Service’ and then click CONTINUE.
Step 8: You’ve now reached the ‘Name your blog’ page. If your blog is on a very specific subject, the name should reflect that. Entitling a blog ‘Recipes’, for instance, and then not writing anything about food or ingredients would cause confusion. If you’re going to muse about life in general on your blog, then your blog name should reflect this.
Do a search on other blogs to make sure that none of them has a name similar to the one you’re considering, to make sure that yours isn’t going to be confused with someone else’s.
Step 9: Type in your blog title. Then, in the second box type the same name without any spaces. This will be the website’s url (that is, address), which will end with ‘.blogspot.com’ – for example, myblog.blogspot.com.
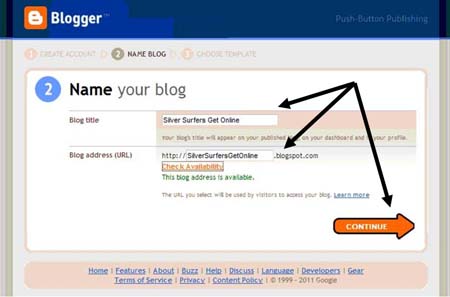
Step 10: Click Check Availability to make sure that this blog url hasn’t been used by anyone else.
Click Continue.
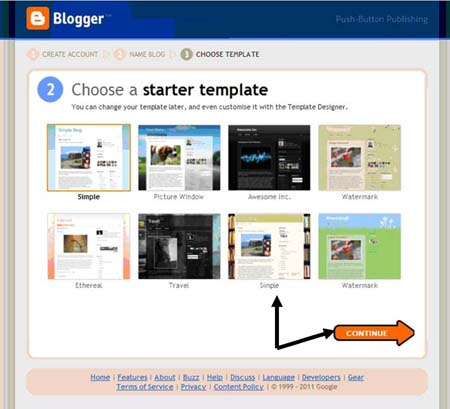
Step 11: Choose a template. A simple design is best, as it won’t distract the reader. When you have chosen, click Continue.
Step 12: Click Start Blogging. You’re now ready to start typing your first blog post!

Step 13: First, give your blog post a title. Each post should have one as they’ll contain different information. Some people use a date or a year and some create a title about a specific subject. This one is called: ‘You are never too old …’
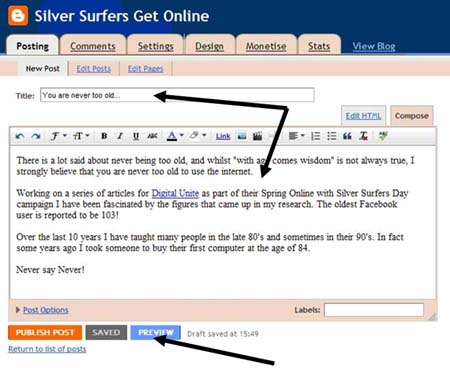
Step 14: Type your blog post in the box. You can use formatting (bold, underline, italics) and include images or hyperlinks to other websites. Try out the tools at the top of the text box to see what they will do.
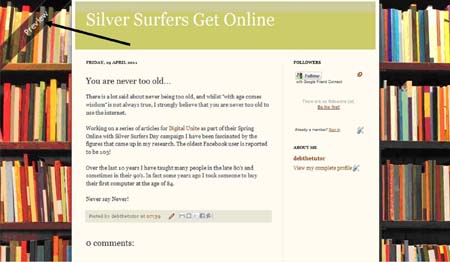
Step 15: When you’ve finished typing, it’s a good idea to check out your blog before you publish to the web. To do this, click Preview. A new window or tab will open showing your blog as it would appear if it were published. This will give you an idea of whether the template and your text look okay together.
Close the window when you’ve finished looking. If you’ve seen anything you want to change, you can do this now in the original template.
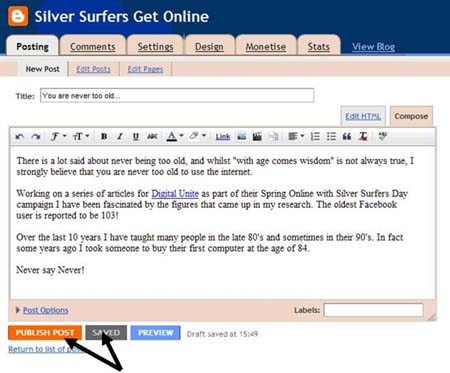
Step 16: If you’re now happy with your blog, click Saved and then Publish Post.
Step 17: The final page of the example looks like this when posted:
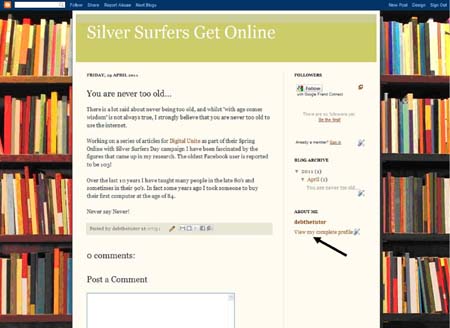
You can add additional information to your profile, which can be seen when readers click View my complete profile, but this isn’t essential. Telling people about who you are and why this subject is important to you may be relevant, but this can be added at any time.
Remember: if you want a blog that people come back to, it’s important to keep adding new posts.
Done!
Debbie Brixey is a Digital Unite tutor based in south London.