


Using numbered or bulleted lists can help if you want to make items stand out or show important steps in a document.
This guide explains how to insert bullet points or numbers in a document in Microsoft Word 2010, but generally the steps will be the same in both earlier and later versions of Word. Visit the Microsoft Word support website for more details.
You’ll need:
- A computer with Microsoft Word installed.
Follow these step-by-step instructions to created a numbered or bulleted list
Step 1: Open or start a new Microsoft Word document if you do not already have one open.
Step 2: To create a numbered list, click on the numbering icon at the top of the document.
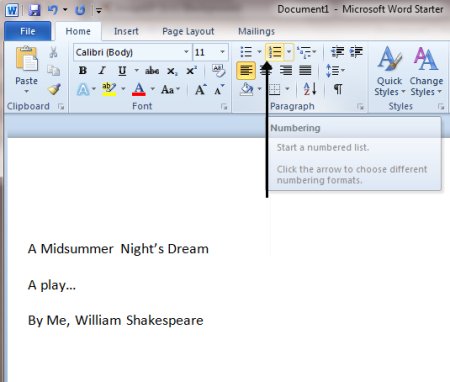
Step 3: The first number will now be inserted into your text.

Step 4: Type the first item on your list.
Step 5: When you press the ‘Enter’ (or ‘Return’) key to go to the next line, the next number will be inserted and so on.

Step 6: To stop the numbers being inserted and go back to standard text, click on the numbering icon again at the top of the document.

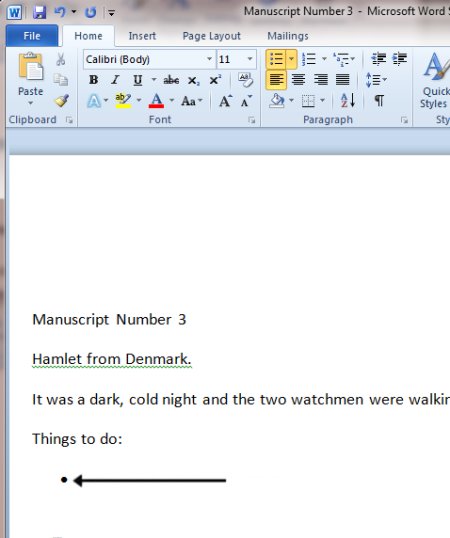
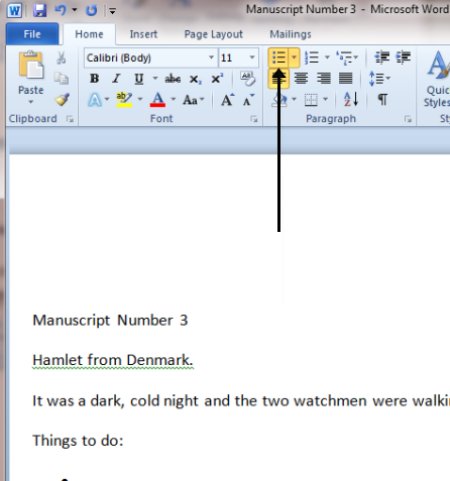
Step 7: To create a bulleted list, click on the bullets icon at the top of the screen in the menu ribbon.

Step 8: A bullet point will be inserted into your text.
Step 9: Type your list. Every time you press the ‘Enter’ key to go to the next line, a new bullet will be inserted.
Step 10: To stop bullets being inserted, click on the bullets icon again.
Last updated 3rd July 2019.