


A back-up is a copy of all the files on your computer. If you have a back-up, you’re protected if, for example, you delete a precious photograph by mistake. Data is a precious commodity, and one that's vulnerable to hardware crashes, malware attacks and even flood, fire and theft. Therefore, a regular backup routine is an essential way to protect against losing those irreplaceable photos, documents and other digital files.

Creating a back-up
There are basically two types of data that need to be backed up:
- the files that you create and update frequently.
- the programs, applications, etc. that make up the ‘system’ that your computer depends on to run and which are updated only occasionally.
You can back up as often as you like – monthly, weekly or daily. But it’s common to make a large back-up of the entire system and your folders at the start and, after that, only back up those items that have changed since the last back-up.
Some computers have a second hard drive built in for back-ups. However, you’ll be more secure if you store your copies on a free-standing external hard drive with a very large storage capacity. These can be bought relatively cheaply. You can then remove this hard drive from your computer and keep it safe in case of fire or burglary.
Follow these step-by-step instructions on how to back up your computer on a Windows 10 computer
Choose where you will backup to. One of the best options is an external hard drive that plugs into one of your USB ports. You can get them at most electronics stores. Try to get one that has twice as much storage space as your computer, so you have room for multiple backups and so you have room for all the data you might get in the future.
File History backs up all the folders in your user account folder (C:/Users/[accountname]). These include your desktop, documents, downloads, music, pictures, and a few other folders. Most importantly, File History monitors these folders for changes and automatically backs up any files that have been added or modified.
To set up and enable File History:
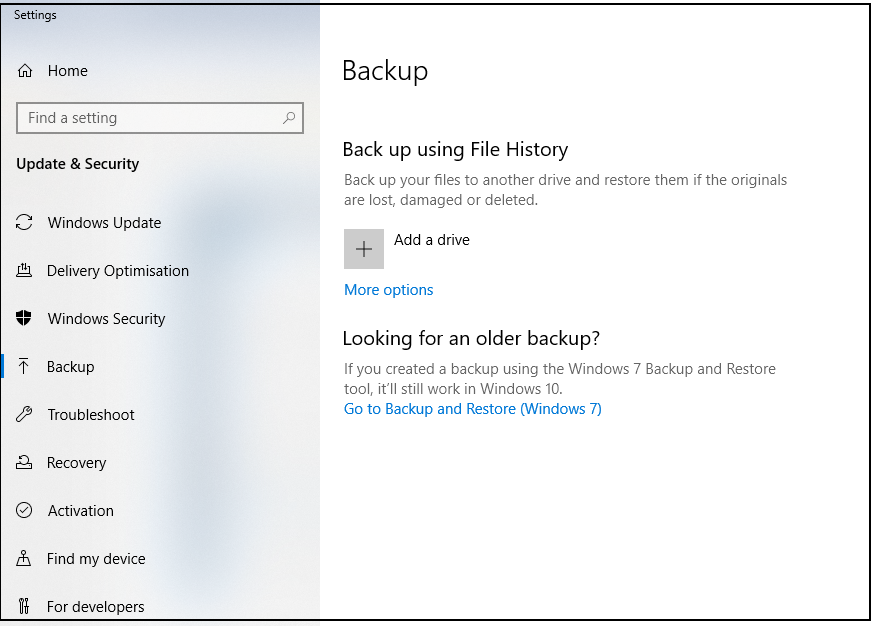
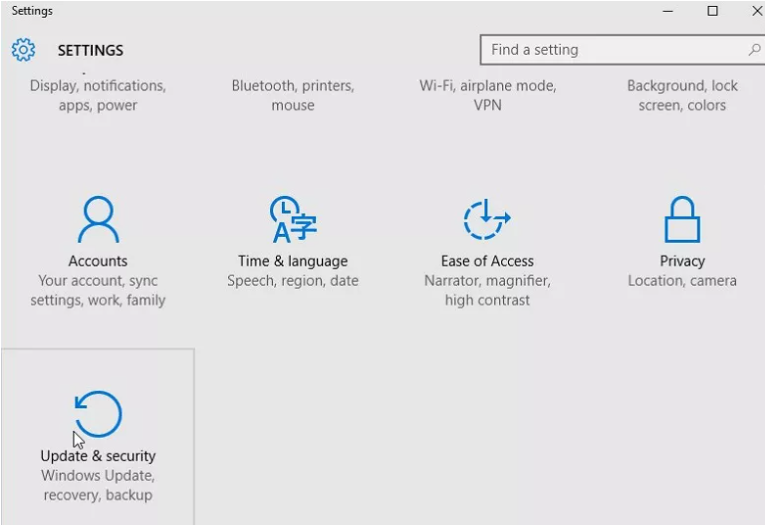
- Go to Start > Settings > Update & Security.
- Select Backup and click Add a drive.
- Select the drive or network location you want to use for File History’s backups.
4. Click More options. Here you can start a backup, change when your files are backed up, select how long to keep backed up files, add or exclude a folder, or switch File History to a different drive.
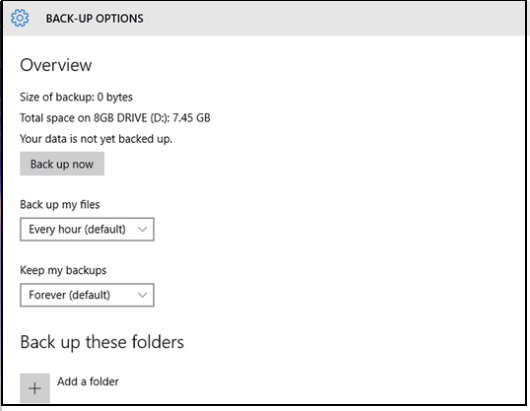
By default, File History creates backups of your files once an hour, but if you want it to start straight away then you can just click the button marked Back Up Now.
Making regular backups of all your files can take up a lot of space on your external hard drive so there’s a second pull-down menu that tells File History how long it should keep all those backups. The default option is to keep them forever – but you can vary this from one month to two years if you want. You can also tell Windows 10 to delete older backups automatically, which will prevent your hard drive from filling up too quickly.
Restoring individual files from Windows 10 backup with File History
If you have accidentally deleted a file, or want to revert to a previous version, then you can restore it from your backed up files.
To locate a file from your backup drive:
Go to Start > Settings > Update & Security
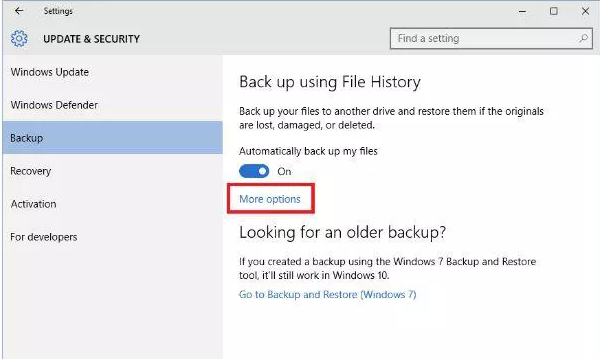
2. Click Backup and under Back up using File History, toggle on the Automatically back up my files option.
3. Click the More options button.
4. Click Restore files from a current backup.
5. Type the name of the file you wish to restore in the Search box located on the top right corner of the window and use arrows to navigate to different files and folders.
6. Finally select the relevant file and click the Restore button.
Last updated 22nd May 2020