


With today’s digital photography software, it’s very easy to edit your photos, whether your goal is to correct mistakes or add a creative flourish. Below we’ll run through some of the ways you can use the software to do both.
Editing photos and videos using the Windows Photos app
Before you can begin, you’ll need a photo software program. In this guide, we’ve used the free Windows 10 built-in Photos App which makes it easy to organise, find and share digital photos. You can use it to make quick edits to photos ensuring your snaps look better than ever.
Key features and benefits of the Windows 10 Photos app
- No need to install the app as it is already in Windows 10.
- Editing tasks like cropping, adjusting and annotating are simple.
- You can save edits to the master file or save an edited copy of the file.
- The picture viewer is in a familiar Microsoft format.
- You can bring in (import) photos from other devices such as cameras, smartphones, etc.
- Has a search box so you can find your images.
- A share button to send images and videos directly from within the app and upload them to cloud services (storage that is not on your device).
- Built-in video editor for light editing.
Starting Photos app
The Photos app should be on the Start menu (click on the Windows icon at the bottom left of the screen) as a tile with a blue background (it’s the tile in the top right corner in this example). If you can’t see it, you can search for ‘Photos’ in the search box at the bottom.

If the app is already there, it will probably be displaying some personal images if you have already added to some to the Pictures folder or if photos have been uploaded to your OneDrive account. (OneDrive is Microsoft's cloud based storage tool).
Finding your pictures
Photos is primarily designed to work with OneDrive, giving access to all the photos previously uploaded from other PCs and connected devices. These pictures will then appear automatically in Photos – along with pictures stored on your device in the Pictures library – via the Collection section of the app, organised by date taken.
There are three main options when looking for photos.
- Collection: a view of most recent photos and screenshots, displayed in reverse order by date
- Albums: a series of automatically-created photo albums
- Folders: a tab for all of the photos on your computer in specific folders—your OneDrive photo folder and your “Pictures” folder in Windows.. To add folders to this view, click “ “Add a folder” to manually select one in Windows Explorer.

Editing a photo
With the Windows 10 Photos app, you can easily crop, rotate, add a filter, and automatically enhance your photos (follow our instructions below). When you click on a photo it will open it up. Using the + and –-buttons will zoom in and out.
Crop: adjusting your picture to cut out something you don’t want included e.g. a scenic shot with a van in it or too much space around the main subject or to make the picture smaller.
Rotate: Sometimes, photos display the wrong way round so you can use the rotate option to correct this.
Filter: this is an effect you can add to photos, for example you can make a colour photo black and white or sepia tone or add a hazy effect.
Enhancing: You can make photos brighter, darker or sharper and remove ‘red eyes’.
To adjust your photo:
- Select a photo to edit from Collections, Albums or Folders
- Click and drag any part of the image to move it around, or click the “Actual size” button (the box with corners in the lower-right) to make the photo bigger (maximise) it. Select your image by clicking on it.
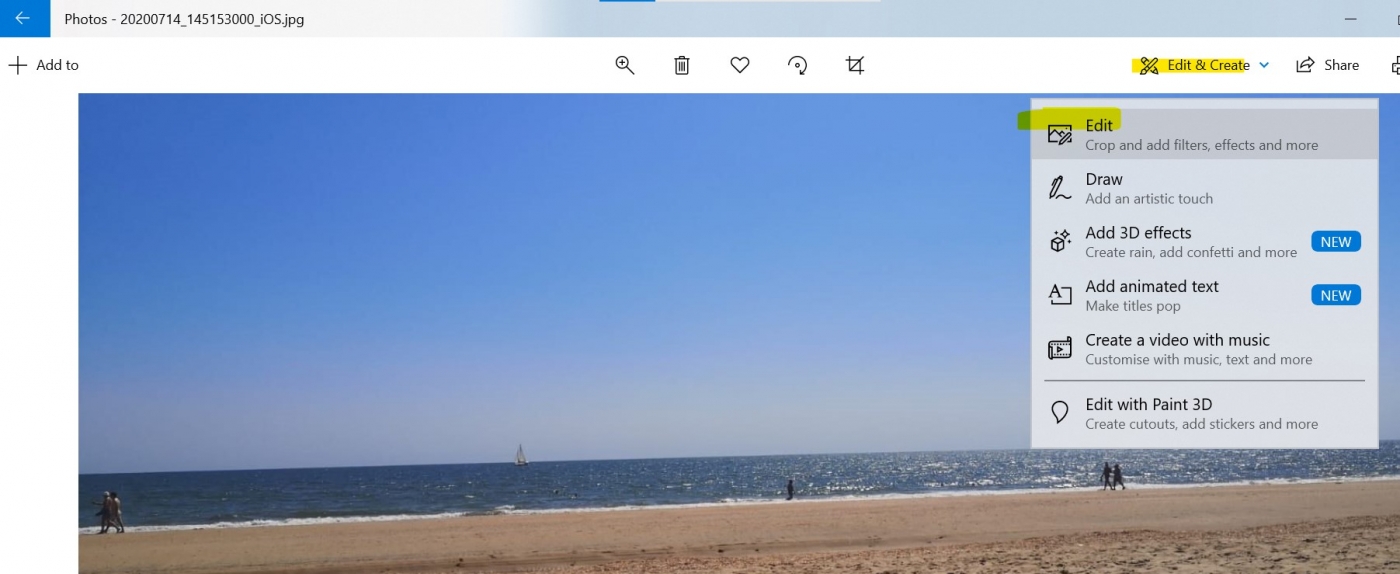
- Then Edit & Create at the top of your screen.
Select Edit, and then select either Crop & rotate, Filters, or Adjustments to tweak size, light, colour, clarity, and remove red eyes.
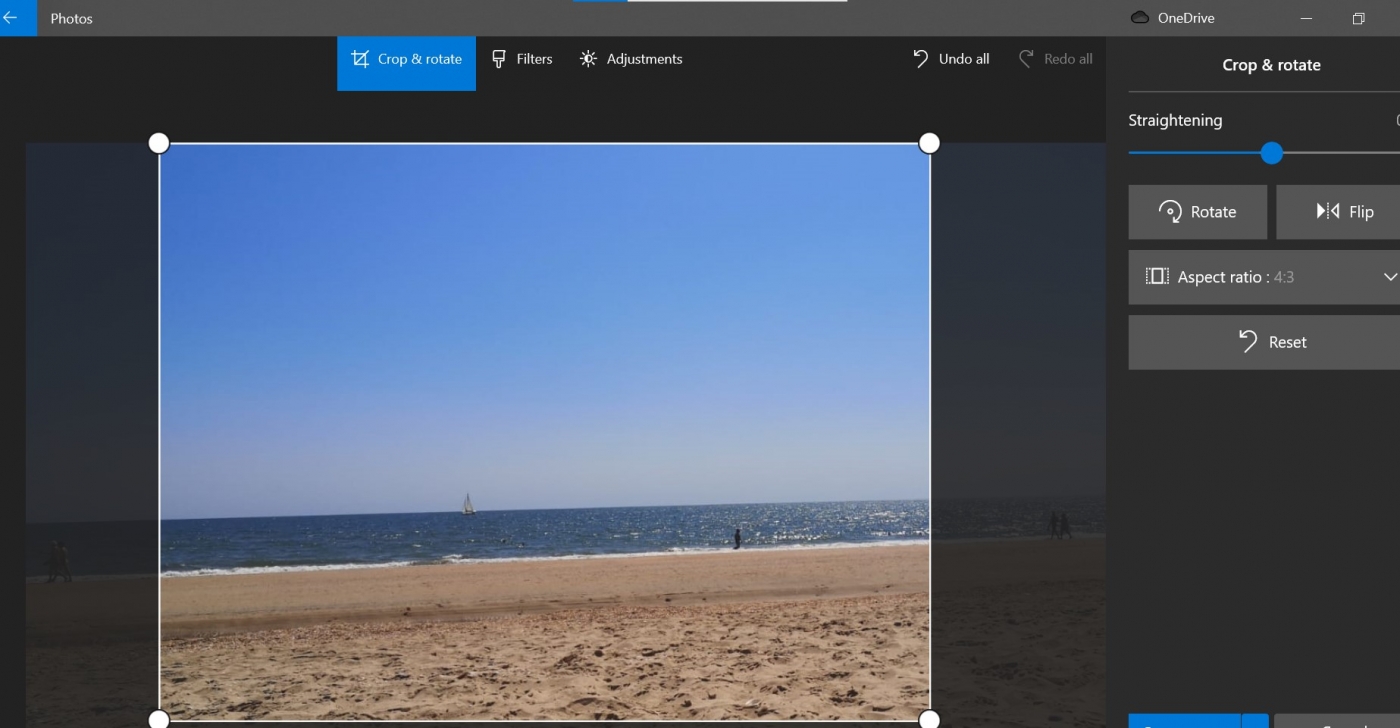
Crop & Rotate
Click and drag the circles on the corner to manually select a cropping box, or click the “Aspect ratio” button to choose a standard size. This is quite useful if you want your image to be viewed on devices, like a smartphone or TV (16:9), iPad (4:3), or a corporate projector (usually 4:3 as well).
The “Flip” button will flip the image horizontally, but not vertically, and the “Rotate” button will spin it clockwise by 90 degrees.
Adjustments
Use the “Light” slider to adjust the contrast, exposure, highlights, and shadows of the image, with the master “Light” slider being a combination of all four. The “Colour” slider handles saturation, (level of colour) with 0 reducing the image to greyscale and 100 making it very vibrant.
The “Clarity” slider will outline specific edges with darkened shadows or blend them into the background, and the “Vignette” slider will add a white (left) or black (right) vignette effect to the photo.
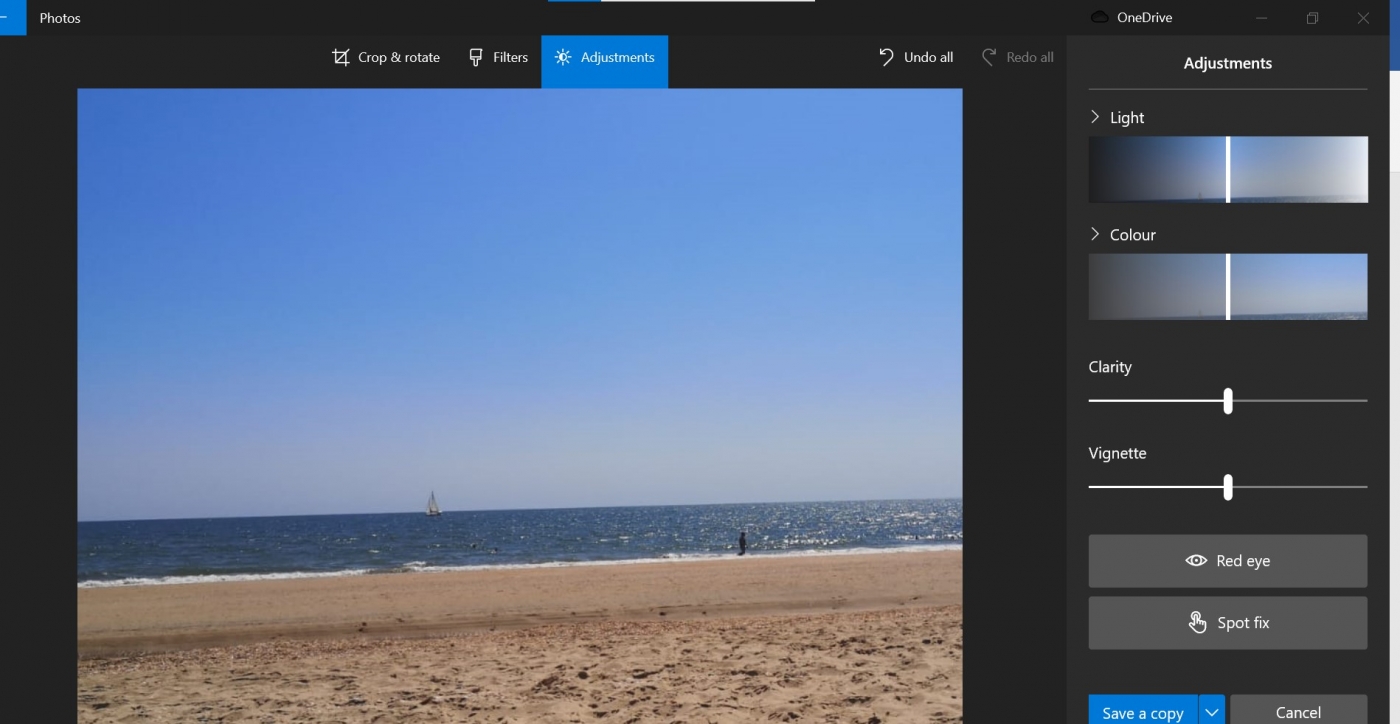
Finally, the Red Eye tool will let you click on a subject’s eyes to remove the red glare from a camera flash, and the “Spot Fix” tool will let you click and drag around a specific area to obscure fine details. It’s good removing acne and other blemishes.
Saving Your Edits
When happy with the edited image, Select “Save a copy” to save the edited version to a folder in Windows Explorer.
NB if you click on ‘Save’ this will permanently change the original photo so it’s always best to save a copy in order to retain the original.
Using Photos app to create or edit videos
With the Photos app you can create videos automatically, or from scratch with music, text, and motion, and modern features, such as 3D effects. To create a video automatically using the Photos app, follow these steps:
1. Open Photos.
2. Click the Video Editor tab.

3. Click the menu (three-dotted) button next to the New video project button, and select the Make a video for me option.
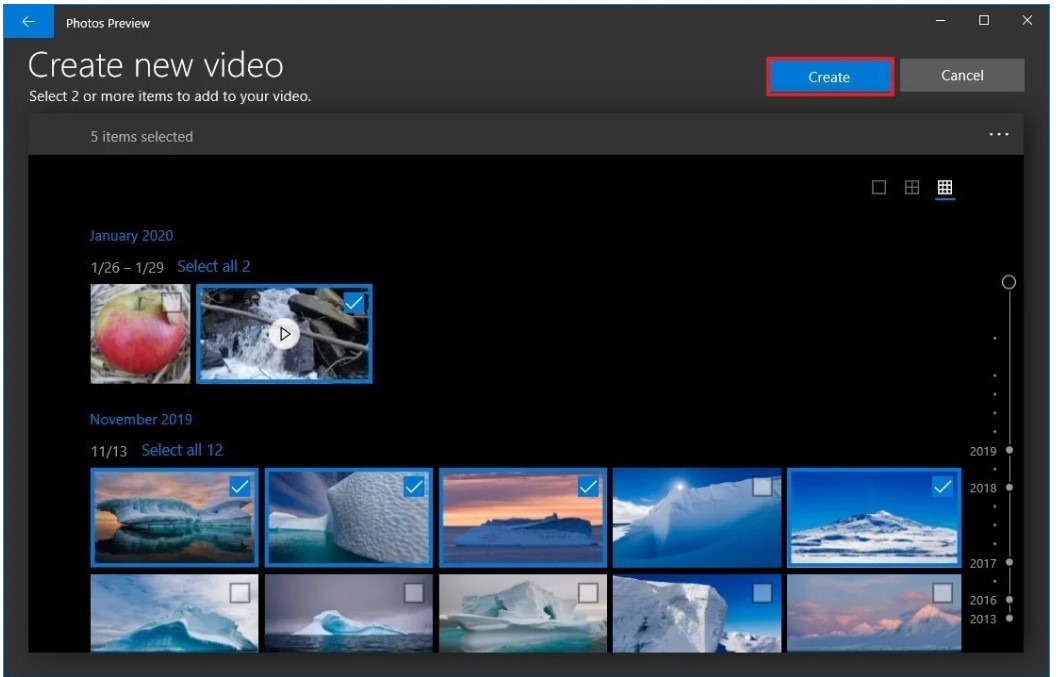
4. Select the videos and images for the project.
5. Click the Create button.
6. Specify a descriptive name for the project.
7. Click the OK button.
8. Click the Finish video button.
9. Use the "Video quality" drop-down menu and select the quality of the video (High 1080p, Medium 720p, or Low 540p).
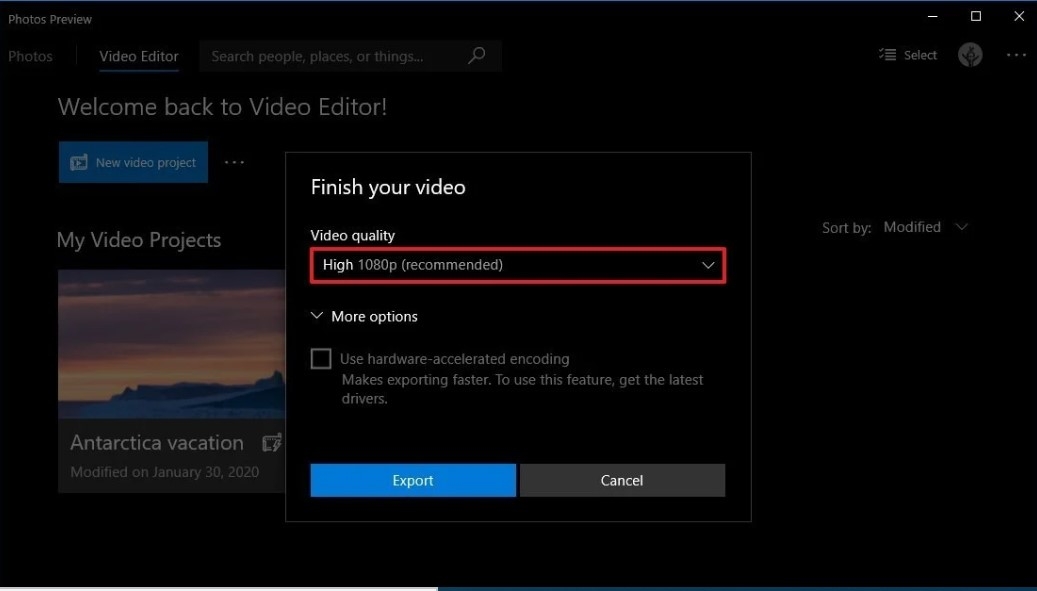
10. Check the Use hardware-accelerated encoding option (if applicable).
11. Click the Export button.
12. Select a folder to save the video project as a .mp4 file.
13. Click the Export button.
Guide last updated: 11 December 2020