


Sometimes, a document that you’re creating may call for different text layouts. The standard layout is for the text to be aligned to the left. Other layouts that can be set up are centred text, where text will be placed in the centre of the document, right aligned where the text will be aligned to the right of the document and justified text, where the text will be aligned to the left and the right.
This guide explains how to align text in Word 2016 for other versions please visit the Microsoft Support site.
You’ll need:
- A computer with Microsoft Word installed.
Follow these step-by-step instructions to centre, left align, right align and justify text
Step 1: Open an existing Word document or start a new document and type your text. The default layout is left align, where text will be aligned to the left margin of the document.
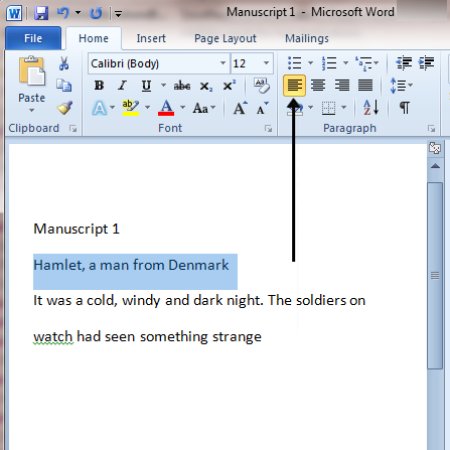
Step 2: To change the layout of your text, select the text that you wish to change by using the mouse or keyboard shortcuts.
Step 3: To centre the selected text, click on the ‘centre text’ icon in the formatting ribbon at the top of the document.

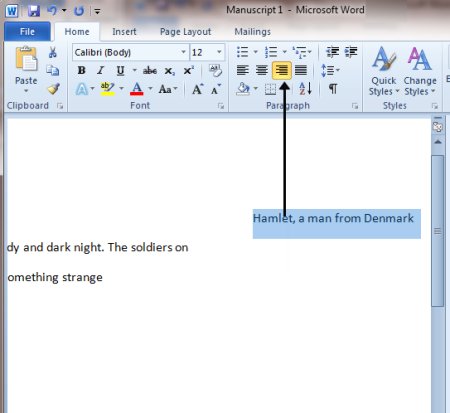
Step 4: To right align the selected text, click on the ‘right align’ icon. This will move all highlighted text so that it’s aligned to the right.
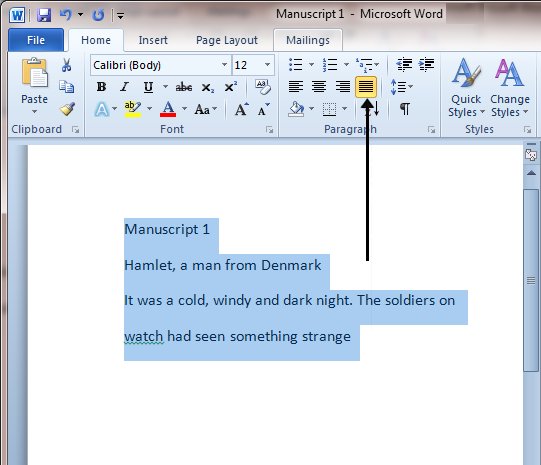
Step 5: To ‘justify’ text so that it is aligned to both right and left, click on the ‘justify’ icon.
Step 6: It’s also possible to change selected text using a combination of keyboard shortcuts, which some people find easier than using the mouse.
- To make text centred, select and highlight the text first, then hold down Ctrl (the control key) on the keyboard and press E.
- To make text right aligned, select and highlight the text first, then hold down Ctrl (the control key) on the keyboard and then press R.
- To make text justified, select and highlight the text first, then hold down Ctrl (the control key) on the keyboard and then press J.
- To make the text left aligned again, press and hold down Ctrl on the keyboard and press L.
Last updated 3rd June 2019