


WhatsApp is a popular smartphone messaging service that allows you to connect with other WhatsApp users to send messages and make calls. If you would like more advice on how to find and install Whatsapp click here.
What you’ll learn in this guide:
- How to invite contacts to use WhatsApp
- How to send and receive messages (including the difference between ‘read’, ‘delivered’ and ‘sent’ statuses)
- How to set up a group
- How to send and manage photos
- How to backup and archive messages
- How to edit notification and privacy settings (including public/private options and blocking
Follow these step by step instructions to master all the main functions of WhatsApp
Step 1: Inviting contacts to WhatsApp
If you want to use WhatsApp to talk to your contacts, you’ll need to make sure that they have it installed on their phone. If they do, they will automatically appear.
If they don’t have WhatsApp, you can send them an invite via text or email with a link to download the App.
- On an iPhone, tap ‘Favourites’, scroll down and tap on ‘Invite Friends to WhatsApp’
- On an Android, tap on the ‘Contacts’ tab, scroll down and tap on ‘Invite friends’
Be aware that if you decide to invite contacts by text, standard text rate charges will apply, so check with your provider that your existing plan won’t incur major charges.
Step 2: Sending and receiving messages
Once you’ve invited all your contacts to WhatsApp, you can start sending and receiving messages.
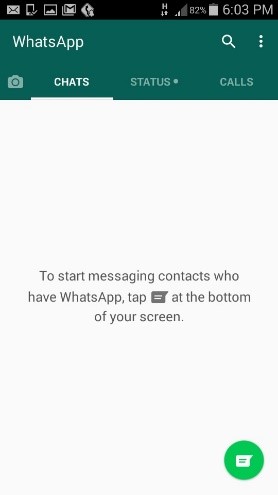
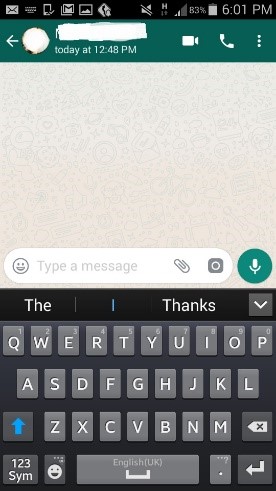
- Open WhatsApp and tap on the chat icon at the bottom right or top of the screen, depending on which device you’re using
- Select the contact you want to send a text to and start writing a message
- Tap the send icon when you’re done (It’s the little white paper aeroplane on a blue background)
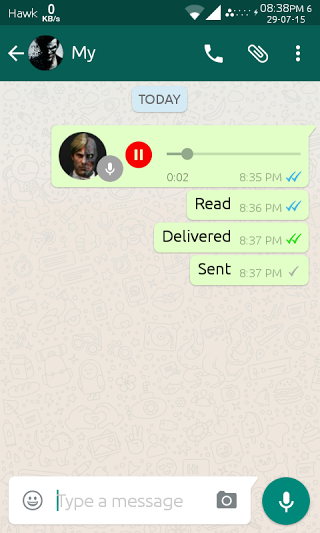
Step 3: Notification ticks
You will notice different coloured check marks next to each message.
- One grey tick means that the message has been successfully sent from your phone
- Two grey ticks means that the message has been successfully delivered to your contact’s phone
- Two blue ticks means that your contact has read your message
If you’ve sent a message to a group of contacts, the second grey tick will not appear until all contacts have received your message. The two blue ticks will not appear until everyone has read the message.
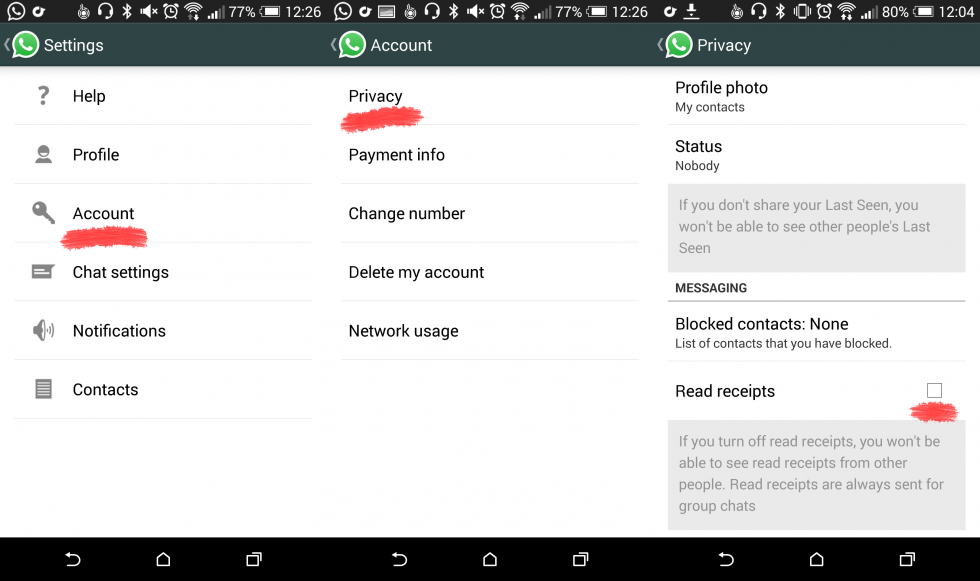
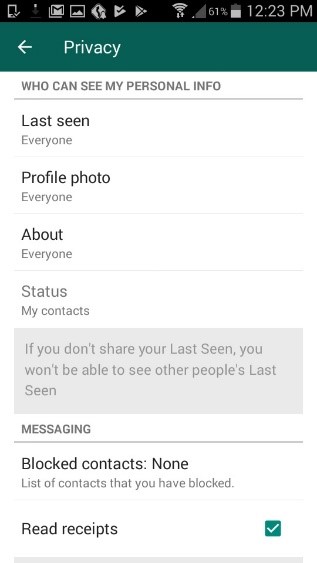
You can change your settings so that your 'read' tick does not appear to both you and your recipient by going to Account>Privacy>Click read receipts.
Step 4: Setting up groups
You can send messages to multiple people at once by setting up a group.
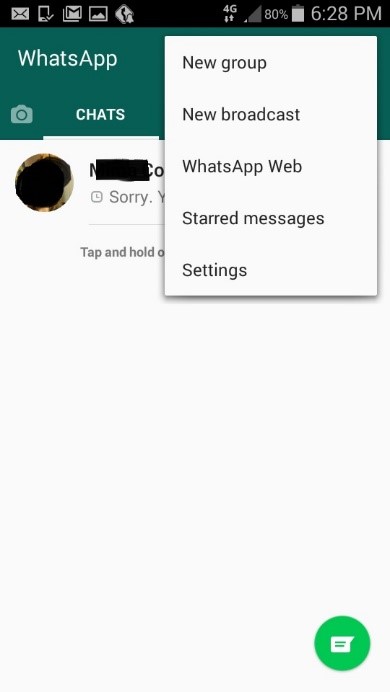
- Go to the chat screen and tap on the three dots at the top right on an Android phone or at the bottom of the iPhone screen.
- Select ‘New Group’
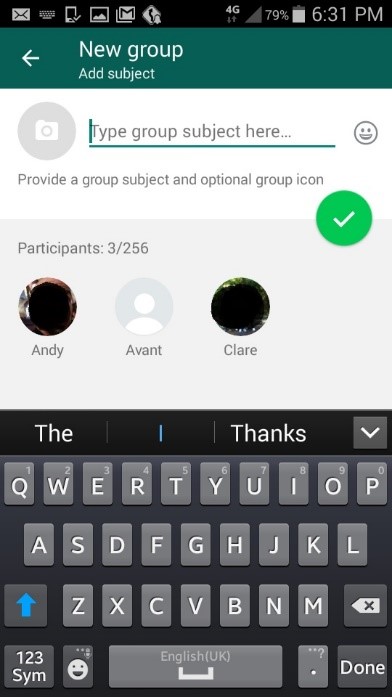
- Now add group members by either tapping on their profile or typing their name into the search box
- Add an optional icon for the group by tapping on the empty photo box and then add a name by typing in the group subject
- Once you’ve finished, tap ‘Create’ to finish or just tap on the tick
You can mute group notifications by going to Settings>Notifications>Group Notifications.
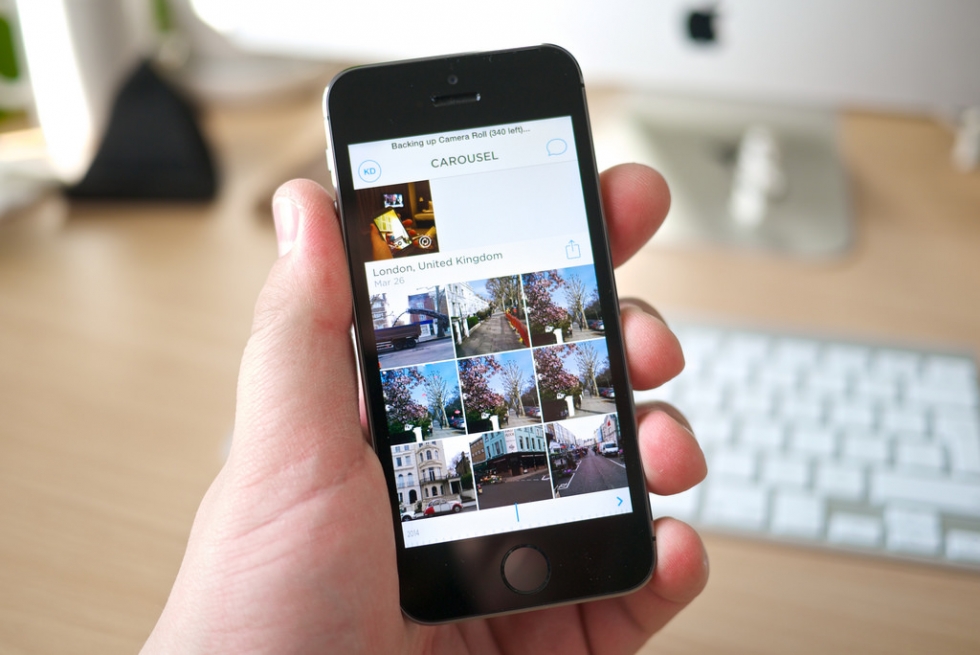
Step 5: Sending photos on Whatsapp
To send a picture to a contact follow these steps...
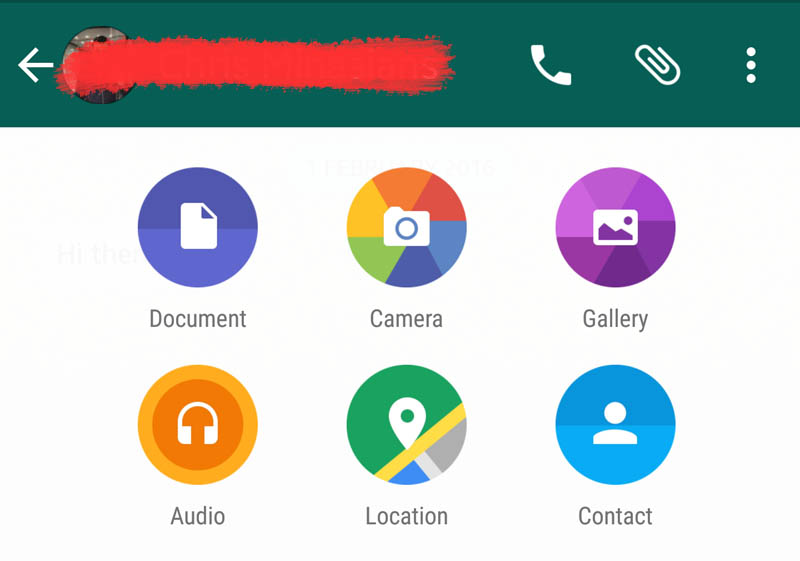
- Open up a chat and tap on the attachments icon (a plus sign on iPhone or the paperclip on an Android)
- Or go into camera mode by tapping on the camera icon at the top of the chat screen and send an image directly
If you haven’t already given WhatsApp permission to use your camera, you’ll need to do so now. You can either use your camera to take a new picture or select the Photo & Video Library/Gallery which will open up your existing pictures for you to choose one to send. Tap on the one you want and it’ll be added to a chat.
Step 6: Managing photos on Whatsapp
When a photo is sent through WhatsApp, it’s automatically saved to your camera roll, making them public to anyone with access to your WhatsApp.
To disable this function on an iPhone follow these steps..
- Go to Settings > Privacy > Photos and turn off the switch for WhatsApp.
- You can also go to Settings > Chats and switch off ‘Save Incoming Media’
(this will stop photos being automatically saved to your camera roll, although they’ll still be stored in your WhatsApp, freeing up memory on your phone)
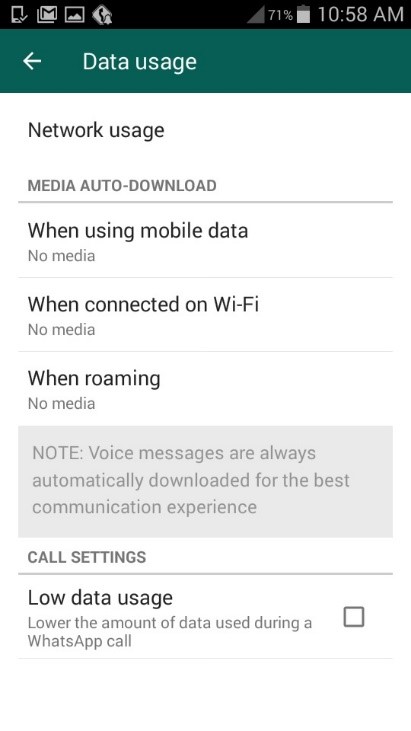
Step 7: Managing photos on Android
It’s a slightly different process on an Android phone...
- In WhatsApp, tap on the three dots at the top right of the screen and go to Settings > Data usage > Media auto-download
- Tap on each option (‘Using Mobile Data’, ‘When Connected On Wi-Fi’ and ‘When Roaming’) and uncheck all the types of media that you do not want to be automatically saved.
- Your choices will be remembered and you can go back into the App
Step 8: Archiving chats on iPhone
If you don’t want to see messages in your chat list, you can archive them. This will not delete them, but you will no longer view them on the chat screen nor will they be backed up to the Cloud.
For iPhone users...
- Go to the chat screen and swipe across the chat you want to archive, moving from right to left. Then, tap 'Archive'
- If you want to archive all of your chats, go to Settings > Chats > Archive All Chats
- You can also unarchive a chat by going to the Archived Chats screen, swiping your finger across the chat from right to left and tapping ‘Unarchive’
- An alternative method is to go to Chats > Search
- Type in the name of the chat or a phrase from the chat you want to unarchive.
- When the results are displayed, swipe your finger across the chat from right to left and tap ‘Unarchive’
- You can view your archived chats by scrolling to the top of the Chats tab and tapping ‘Archived Chats’
It’s worth noting that archived chats will automatically unarchive if you receive a new message from that chat.
Step 9: Archiving chats on Android
The process is very straightforward on an Android phone.
- Go to the chat screen and tap and hold the chat you want to archive
- Select ‘Archive’ or tap the icon of a folder with a downwards arrow on it
- If you’d like to archive all the chats, go to Settings > Chats > Chat history > Archive all chats
- To undo an archive, go to the bottom of the chat screen and tap on ‘Archived chats’
- Select the chat you want to unarchive by tapping and holding and then select the Unarchive icon
Step 10: Backing up chats
All your WhatsApp messages are automatically saved to your phone’s memory, but you may want to create a separate backup in case you lose your phone or want to replace it.
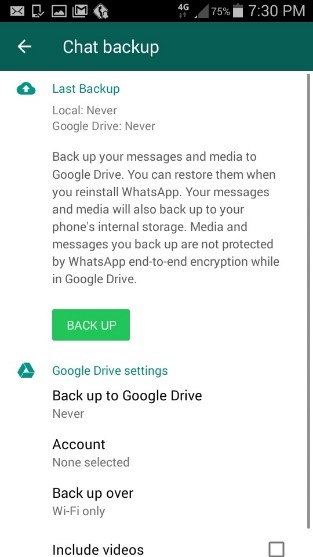
To set up a backup to Google Drive...
- Go to Settings > Chats > Chat backup > Backup to Google Drive
- You will need to select a Google account to backup your chats to, but if you do not have one, you can create one by tapping ‘Add account’ when asked
- Tap on ‘Backup over’ to select what type of network you want to use to backup your chats
Depending on which network you select, you may incur extra data charges.
You can also carry out a manual backup at any time:
- Go to Settings > Chats > Chat backup > Backup to Google Drive
- Select any backup frequency (except ‘Never’) and tap ‘Back Up’ to begin the process
Depending on how many chats you need to backup, this may take a few minutes and you might want to plug in your phone while the backup is processing. After the first backup, subsequent backups will only save new chats.
If you need to restore a Google Drive backup, add the Google account associated with your backup to the phone. Uninstall and reinstall Whatsapp. After you’ve verified your number, follow the prompt to restore your backup from Google Drive. Once the chats are downloaded, tap on ‘Next’ and all your old chats will be available for you to view.
Step 11: Managing notification preferences and privacy
WhatsApp automatically allows any user to view your read receipts, last seen, about and profile photo and all your contacts can see your status updates.
If you’d like to change this:
- Go to Settings > Account > Privacy
Be aware that if you make your last seen private, you will not be able to view other people’s last seen. If you switch off read receipts, you won’t be able to see other people’s as well as hiding your own and read receipts will still be sent for group chats. If any of your contacts have turned off read receipts, you can’t see if they’ve seen your status update. There is no way to hide whether you are online or writing a message.
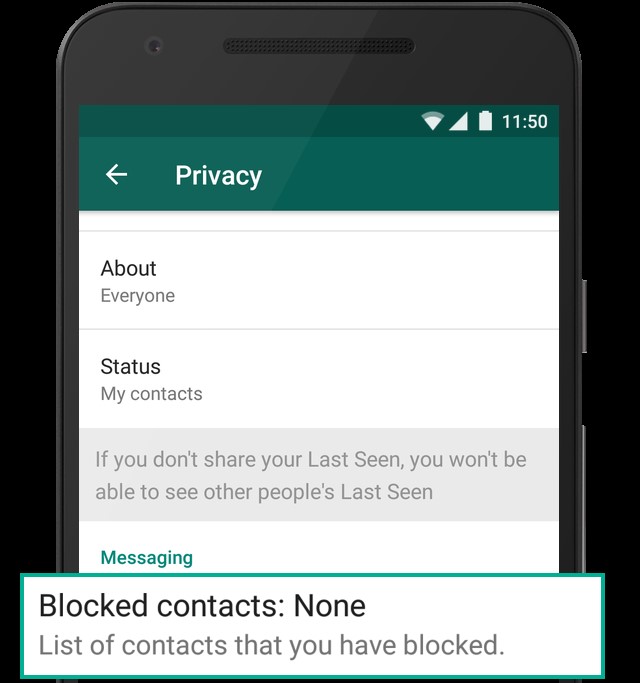
Step 12: Blocking contacts on Android.
If you decide you don’t want to receive any messages, calls or status updates from a contact, you have the option to block them. You will not be able to contact them either and they will not be able to see any changes to your profile or status. However, blocking someone will not delete them from your WhatsApp – you will need to remove them from your phone’s list of contacts to do this.
On an Android phone...
- Go to Settings > Account > Privacy > Blocked contacts > Add contact
- Tap on the contact you want to block
- If they are not saved on your phone open and the chat and select 'Block'
- You also can choose to ‘Report Spam’ to report the user as well as blocking them
-
If you change your mind about any of your blocked contacts, you can unblock them by tapping Settings > Account > Privacy > Blocked contacts tapping and holding the chosen name then tap on ‘Unblock’
-
Another method is to send a message to that contact, which will give you the option to unblock them
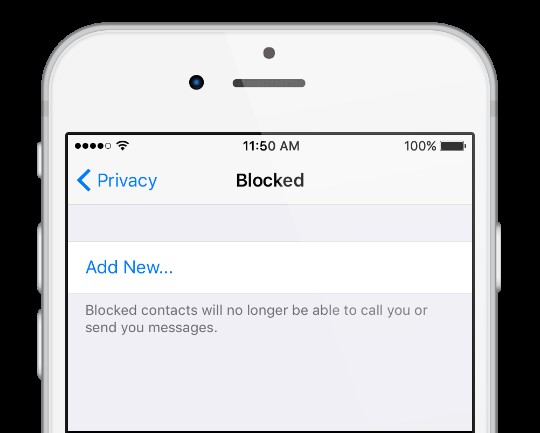
Step 13: Blocking contacts on iPhone
On iPhone...
- Go to Settings > Account > Privacy > Blocked > Add New
- Tap on the contact you want to block
If you want to block someone who is not saved in your phone, open that chat and tap ‘Block’. You can also choose to ‘Report Spam’ by tapping ‘Report and Block’.
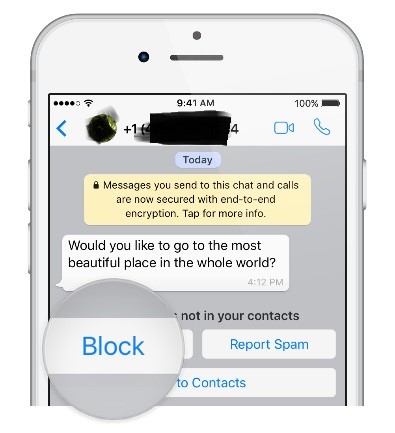
If you want to block someone who is not saved in your phone, open that chat and tap ‘Block’. You can also choose to ‘Report Spam’ by tapping ‘Report and Block’.
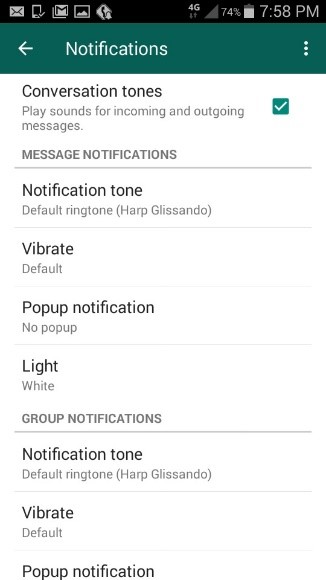
Step 14: Notifications
If you’d like to personalise your notifications, such as ringtones and vibrations:
- Go to Options > Settings > Notification
- Select the options you’d like
Note that these settings will only apply if the app is running in the background. If you are using WhatsApp, the notification sound defaults to the automatic double beep. If your phone is set to silent, you will not hear any WhatsApp notification sounds. You cannot disable popups.
Now you can use WhatsApp to invite contacts and send and receive messages to individuals and groups. You can create, send and manage photos, as well as back up and archive messages. You can also customise your notification and privacy settings to suit your needs.
From here, you might want to learn how to set up your email account to give yourself even more ways of staying in touch with all your contacts. You also might like to explore how to video message or use FaceTime to get the most out of your smartphone
Check out our Next Steps links below for more iPhone and Android guides.