


If you use the internet to venture into the World Wide Web on a regular basis, you’ll soon encounter websites that you may want to return to. Obviously, you could write down each one’s address (also known as a ‘url’, for ‘uniform resource locator’) or you could do a search for them each time you want to access them. But why do that when you can use Favourites?
With Favourites, as they are called in Internet Explorer (they’re ‘bookmarks’ in the Firefox and Safari browsers), you can store web addresses and so easily revisit pages that you like. Favourites can appear either in a list or on the ‘Favourites Bar’ (‘bookmarks toolbar’) right at the top of the browser home page. Where you put them really depends on how often you want to visit a particular site.
Follow these step-by-step instructions to add to Favourites on Windows 10 using Internet Explorer
Step 1: Open Internet Explorer, you can pin it to your taskbar, or use Cortana to search for it.
Step 2: Click on the star on the top right-hand corner of the window, once you click on it, it will turn yellow.

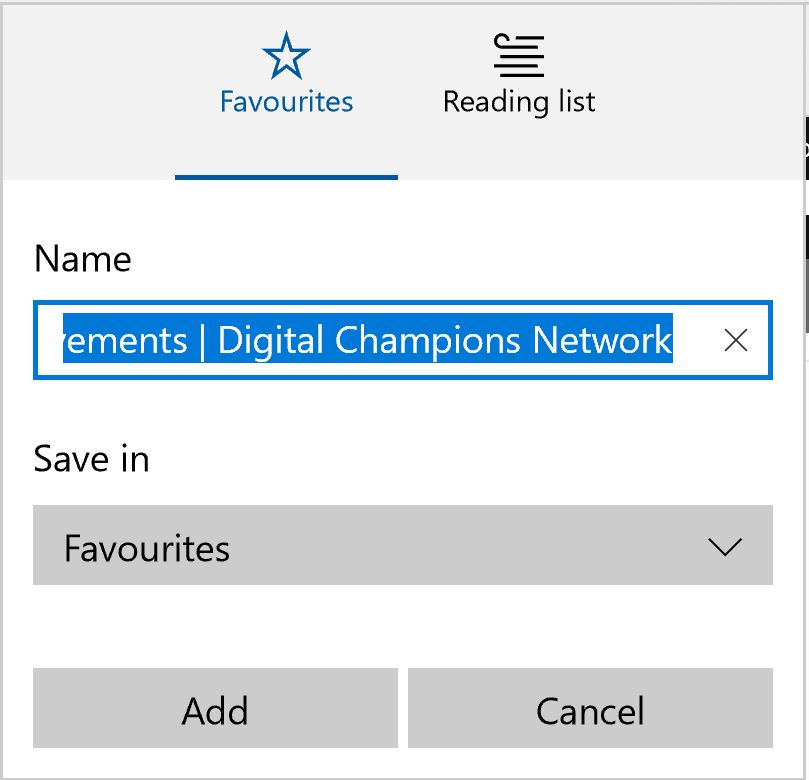
Step 3: A pop up will open up allowing you to add your page to your favourites folder.
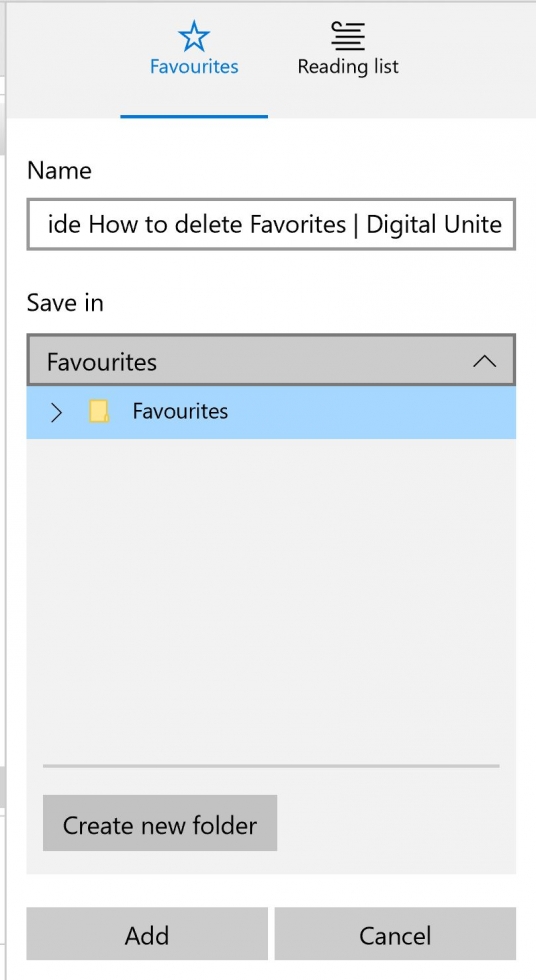
Step 4: You can keep your favourites organised by keeping them in folders. To create a new folder click on 'Create new folder'.
Step 5: To organise and view your favourites, click on the second star with the list icon.

Step 6: This will open your entire list of favourites and your favorite folders.
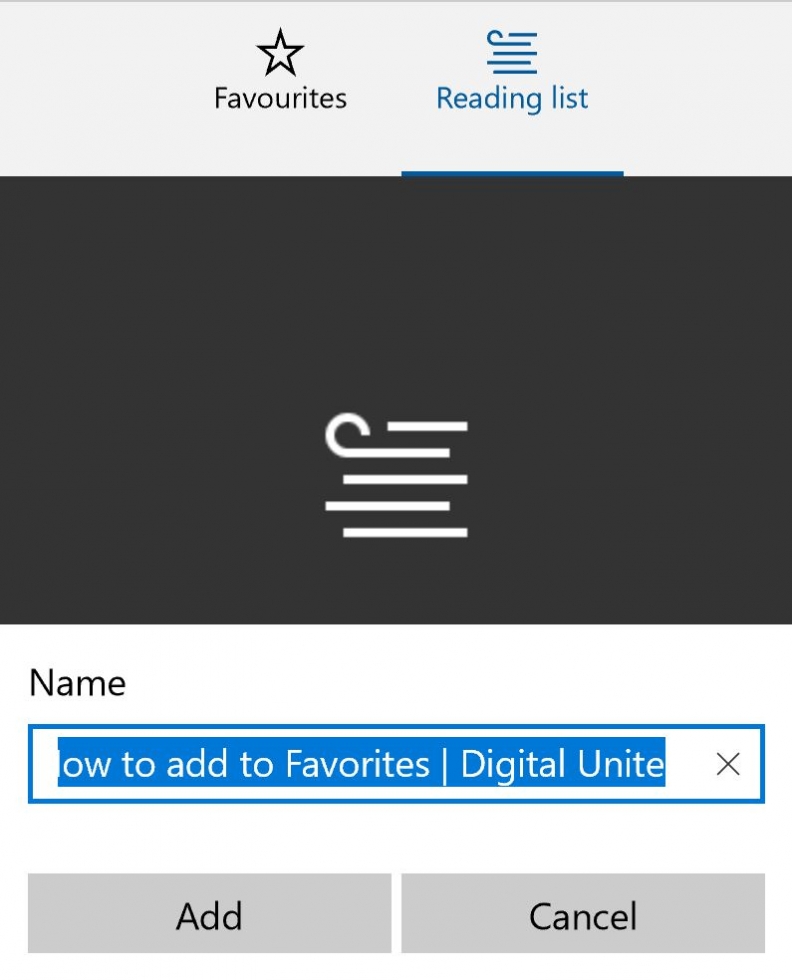
Step 7: You can also add a reading list on Internet Explorer by selecting the star then clicking on 'Reading list'
To bookmark using other browsers click on the links below:
Done! Now, you can create folders for all the pages you wish you bookmark. Why don't you have a go at adding a few favorites to your browser? Have you looked at our guide on deleting favourites, have a look in the Next Steps link below.