


StreetLink enables members of the public to alert local authorities and street outreach services in England and Wales about people they have seen sleeping rough. The service is available via the web, mobile app or phone line and offers the public the means to do something to help and is the first step to ensuring the person they are concerned about is connected to the available support.
This guide will teach you:
- How to register for a StreetLink account
- How to send an alert to the StreetLink team to help them locate people who are rough sleeping
- How to become a StreetLink Champion
The form will ask you for:
- A specific location of the rough sleeping site
- Details of the time that the rough sleeper has been seen in this location
- Any information about the rough sleeper that will help find them (gender, age, what they look like and what they are wearing)
For this guide we have used the desktop web version of StreetLink. You can also access this through the app.
Step 1: Registration
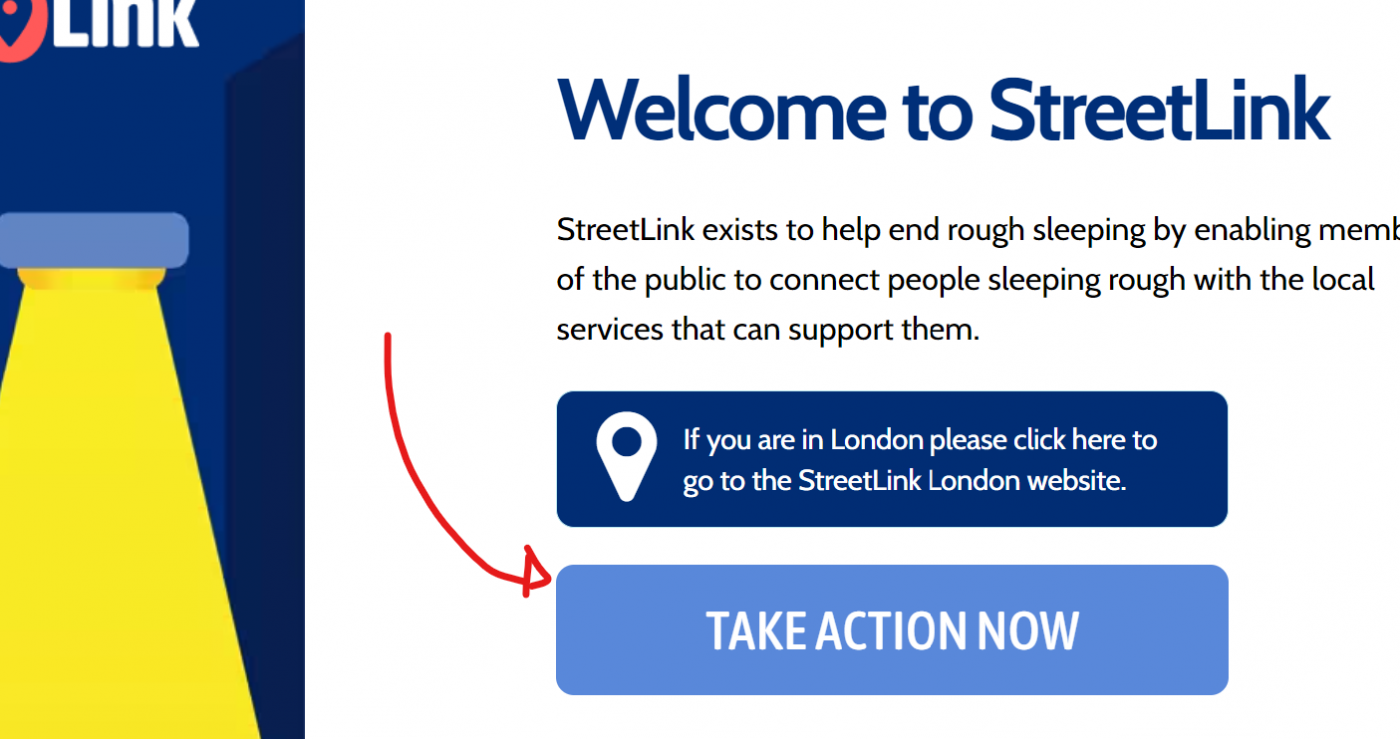
To register for an account to the StreetLink website and click on ‘Take action now’. Alternatively, you can click this link.
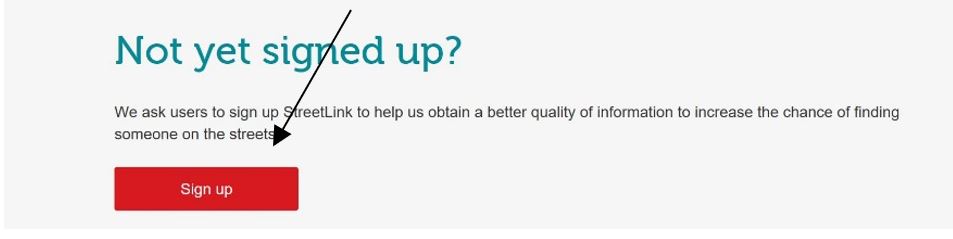
Then, you need to click on Sign up to create a StreetLink account.
Step 2: Create an account
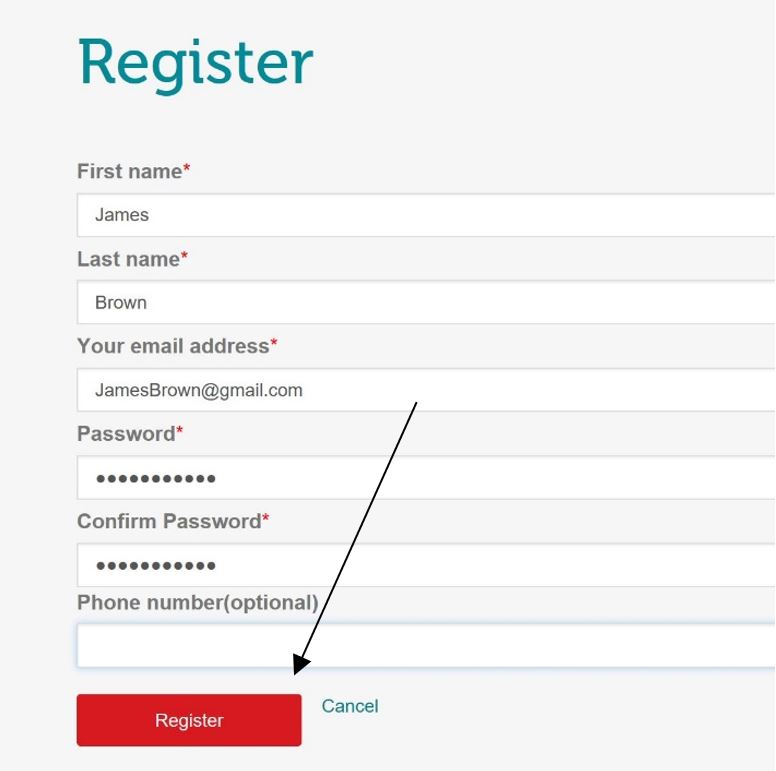
The next step is easy, you will need to fill in a short form including your personal details, your name and email address. Choose a password that you can remember as well. Once you have done that, click on Register.
Step 3: Send StreetLink an alert
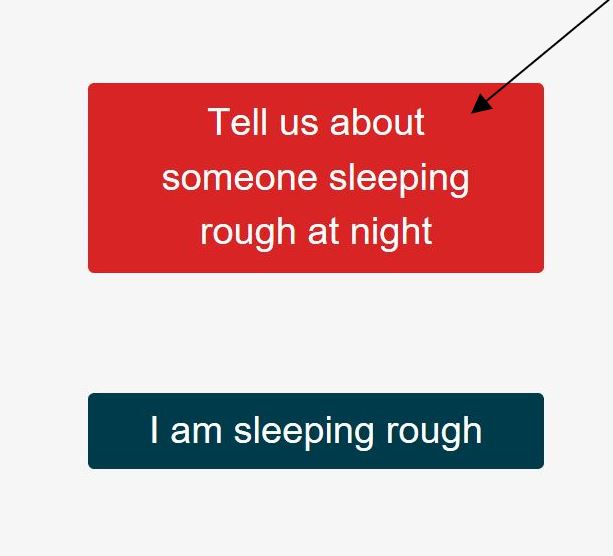
Once you have set up your account, you will be taken to a page with two options, ‘tell us about someone seeping rough at night’ and ‘I am sleeping rough’. For this guide, you need to set up an alert by clicking on the first option.
Step 4: Give StreetLink details of your rough sleeper
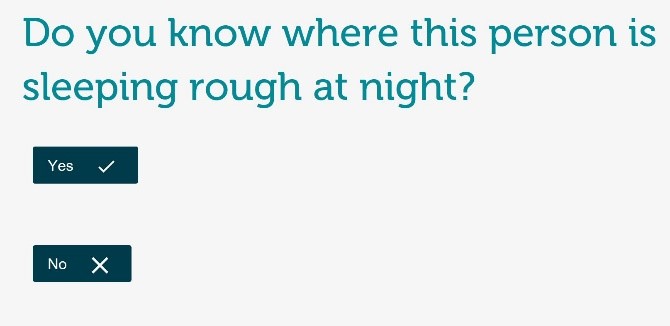
To send an alert you will need to fill in the form that StreetLink has created. This should only take you between 5-7 minutes depending on how descriptive you are. Answer the questions by clicking on the options that StreetLink has provided. If you know where the rough sleeper is click on ‘Yes’.
Step 4a: You will need to pinpoint the location of the rough sleeper by adding the postcode in the white space. Click on the white box and start typing in a post code. For this example, we are going to choose a postcode in London.
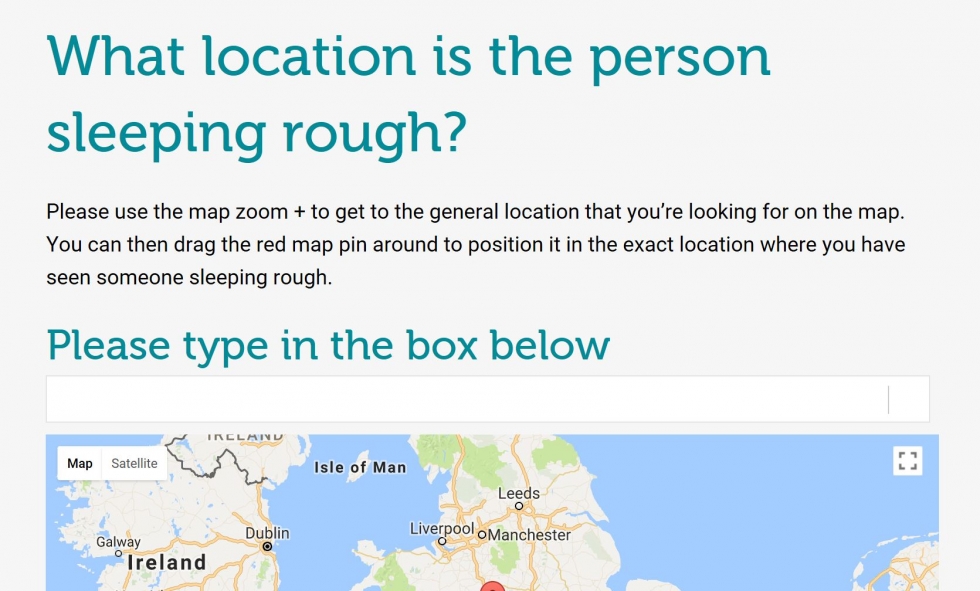
Type in the postcode and this will pinpoint the area of your postcode
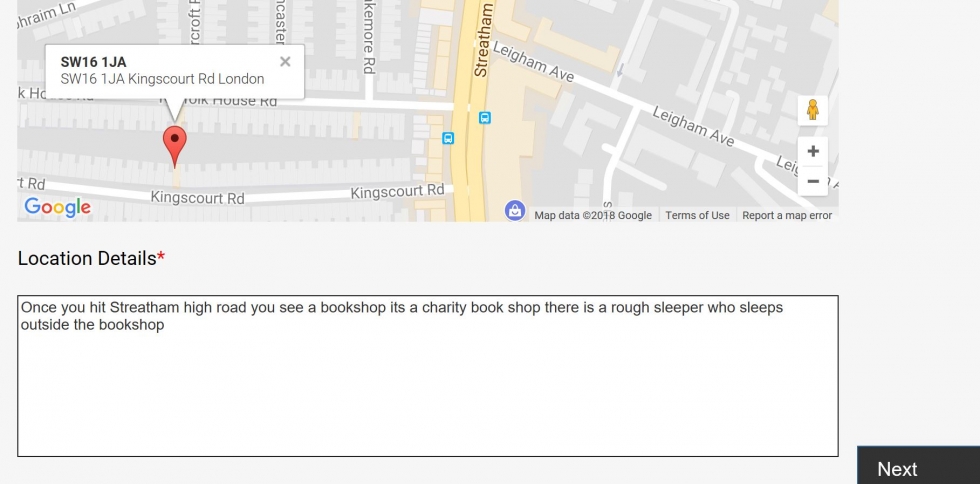
This is the most important part of the alert set-up: You will need to add a description of where the rough sleeper is. Try to be as accurate as possible, the information you provide is sent to teams who will go out and look for the person you have seen at the location you give. Make it as easiest as possible to look for this person. Once you have done this click on ‘Next’.

4b: Add in your rough sleeper details – gender, age range and what they look like. Again, try to be as specific as possible. Mention any hairstyles they might have or what clothing you often see them in. Add in anything that makes them distinct; maybe it’s a brightly coloured backpack they carry, or a pair of Chelsea boots they always wear.
The more specific you are the easier it will be to identify them.

Step 5: Finalise your alert
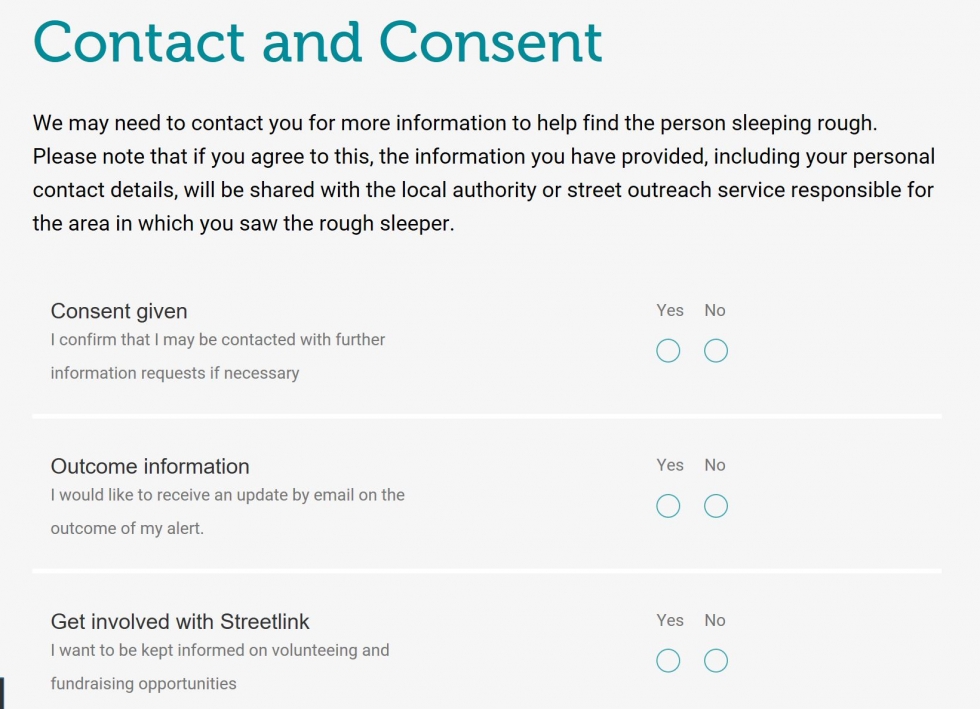
The last step of this will be choosing your consent options. Select ‘Yes’ or ‘No’ for each option. If you wish to be contacted for further information, select ‘Yes’ if not then select ‘No’. Once you are finished click on ’Next’.
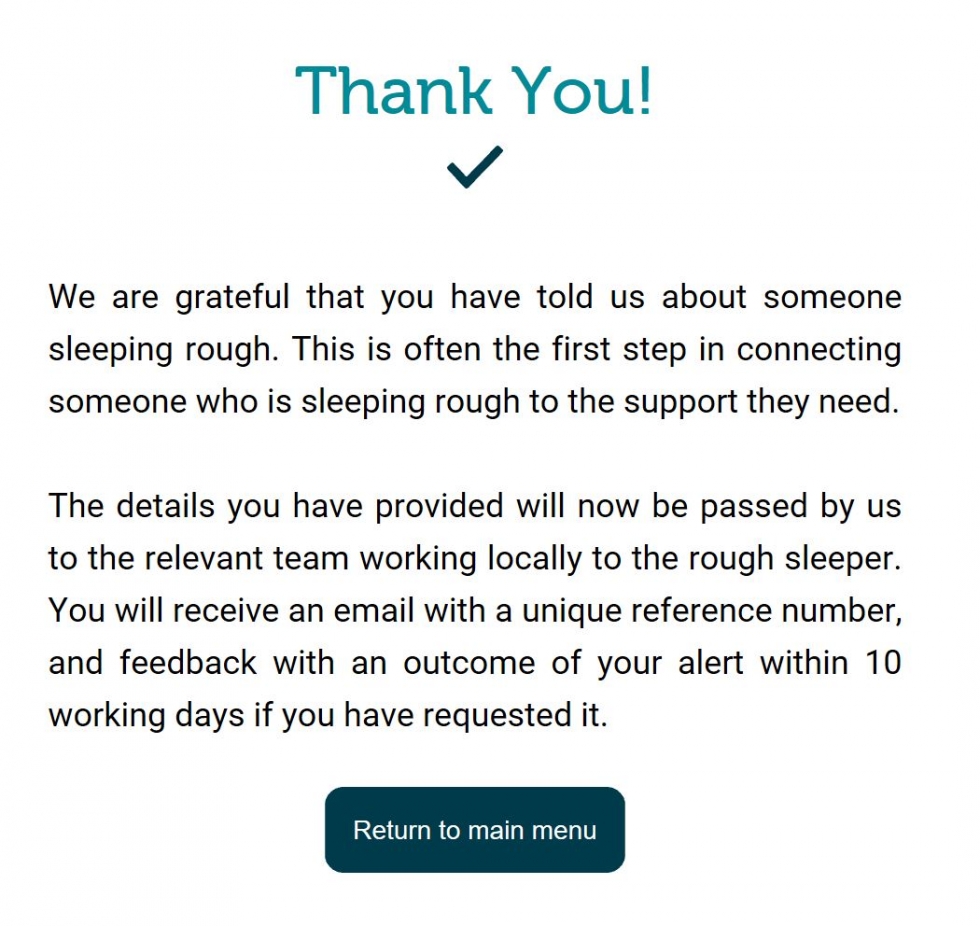
You will receive details of the action the local authority normally takes when they are told someone is sleeping rough in their area and an update on what has happened as a result of your alert within 10 working days if you have requested it.
Well done! We are one step closer to helping one less rough sleeper get off the street. Click on ‘Return to main menu’.
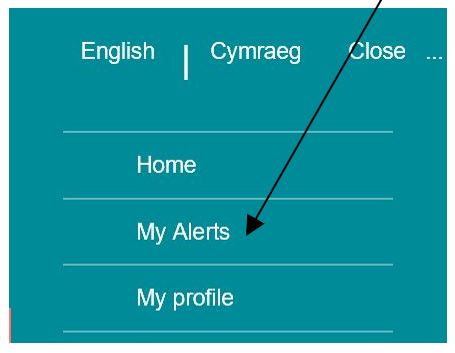
Now that you have set-up your first alert you may want to look at it. To do this click on’ My Alerts’.
Step 7: Amending your profile
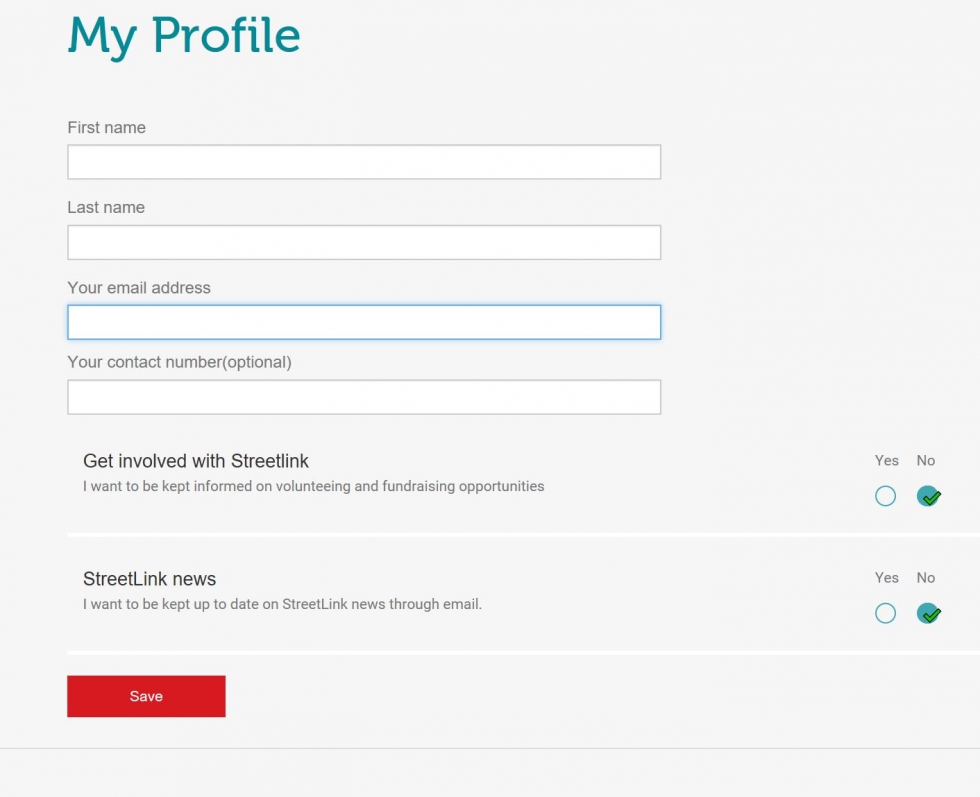
Once you have set-up an account on StreetLink you can amend your profile at any point in time. You can change your name, email address and notifications in the My Profile area by clicking on the drop-down menu.
- To become a StreetLink Champion fill in this application form
- For more Frequent asked questions visit StreetLink’s FAQ page
- If you would like to send a donation follow this link
- To contact StreetLink for more information email: info@streetlink.org.uk.
- And here's a useful website - https://wavelength.org.uk/
We recommend you check out our other community guides such as How to join a local social network too.
Last updated June 2023