


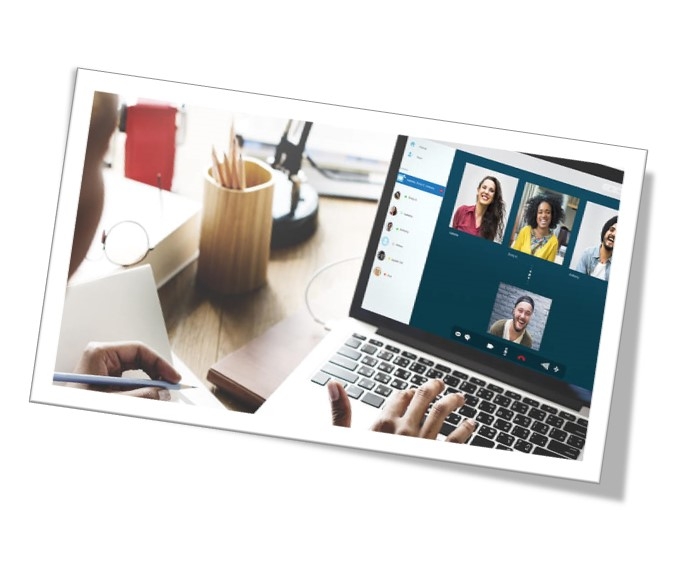
Zoom is an online meeting platform which has surged in popularity during the Covid-19 crisis. It can be used to make 1-1 or group video calls from a computer, tablet or phone. Users can screen share, chat and use interactive features (read our introductory guide to Zoom meetings here).
The basic free package allows unlimited length 1-1 video calls, but group calls are limited to 40 minutes (however during Covid-19 this limit has been lifted). They have paid-for packages which give greater functionality such as recording meetings, and also optional add-ons – such as webinar hosting.
Hosts create meetings, send out invites and do need a zoom account, but participants do NOT need to create a zoom account to join a meeting.
Some links to find help using Zoom:
- how-tos: https://support.zoom.us/hc/en-us
- videos: https://support.zoom.us/hc/en-us/articles/206618765-Zoom-Video-Tutorials
- free webinars: https://support.zoom.us/hc/en-us/articles/360029527911-Live-Training-Webinars
In this guide we will look at:
- How to set up a meeting
- Creating polls and breakout rooms
- Safety and security settings
- Good practice in running Zoom meetings.
1. How to set up a Zoom meeting
We have included instructions on how to do this via the website – but you can set up a meeting via the app or downloaded software
- Log in to your account on the website.
- On the left hand bar click on Meetings.
- Then click on the blue button Schedule a new meeting.
- Give your meeting a name and a short description.
- Add the date, time and length.
- If you want this meeting to be held regularly, you can click on recurring meeting and further options will open.
- Meeting ID: you will see the choice between generating an automatic ID and using a personal ID. Since 5 April 2020, for security reasons this is set to ‘generate automatic’ which is the best option.
- Next to video you can you choose the video settings – make sure they are turned on for both host and participants.
- Click Save.
Once you have created a meeting and click Save, you will be shown the details of your meeting.
- Go down to Join URL and to the right click on copy the invitation.
- You can then paste this text in an email, whatsapp message, facebook or text. This is the link your participants will use to join. There are three key pieces of information:
- The meeting ID
- The password
- The web link (which contains within it the password).
2. Screen Sharing
To share your own screen, click 'share' and choose what you would like people to see. You will see the following options:
- Screen- sharing your entire screen with all of the applications that are open on it
- Whiteboard- sharing a whiteboard which you can write and draw on. You can invite others you write on this also.
- Applications- the different browsers or applications you have open (e.g. Powerpoint, Word, Chrome)
If you want to share sound, do not forget to click the small box in the bottom left corner of the screen.
To invite others to share their screen you can click the small arrow next to the share screen button, go to 'advanced sharing options' and change the 'who can share' settings to 'all participants'. Or you can click the security button and tick next to 'allow participants to share screen'.
Top tips for screen sharing:
- make sure your desktop is clear and you only have open the applications you need/want to share.
- If you need to input any passwords make sure they are hidden
Find out more about screen sharing here https://support.zoom.us/hc/en-us/articles/201362153-Sharing-your-screen-content-or-second-camera
3. Creating Polls
The host can set up polls before the meeting starts and then launch them by clicking on Polls in the bottom toolbar. Once launched, all participants will see the question on their screen and be able to answer it. Once the host has given sufficient time, they can close the poll and then show the results. With poll questions you can have single choice or multiple choice options.
Find out more about polls here: https://support.zoom.us/hc/en-us/articles/213756303-Polling-for-Meetings
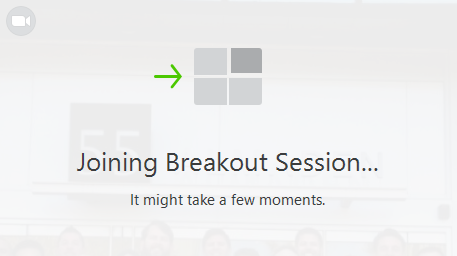
4. Using Breakout rooms
These enable participants to be split off into smaller groups – brilliant for small group discussion (or even pub quiz teams!) The host will need to enable breakout rooms in the meeting settings before the meeting. Then once in the meeting, the host can click on breakout rooms which will be visible in the bottom tool bar and either randomly or manually allocate people to the room. The host can also join any of the meeting rooms. Things to note:
- The host can’t launch breakout rooms from a tablet or phone – it has to be on a computer.
- The main room will always stay open and people can choose to return to it at any time.
- If recording the meeting, only the main room and not the breakout rooms are recorded.
- You can set an automatic length for the breakout rooms and participants will see a count down warning them to re-join the main meeting before the breakout room closes.
- You can move between the main room and the breakout rooms as many times as you like during the meeting.
- You can change the allocation of participants to the room each time, or keep it the same.
Find out more here: https://support.zoom.us/hc/en-us/articles/206476093-Enabling-breakout-rooms
5. Safety and security settings
As with any platform, there are always safety and security concerns. Whilst Zoom’s usage has rocketed recently, there have also been some stories of security issues. SCVO have a good article on whether to use Zoom or not here: https://scvo.org.uk/p/37303/2020/04/08/zoom-calling-and-privacy
As of 5 April 2020, Zoom have updated their security settings. The key changes are:
- You now have to have a password to access a zoom meeting if using the meeting ID number (if you use the weblink it’s hidden into that)/ This is generated and shown when you create a meeting and is shared on the invite
- The meeting ID is set as default to ‘generate automatically’ when creating a meeting – this is suggested rather than using the personal meeting ID (the one that is allocated to the user)
- A waiting room is automatically enabled, meaning people can’t join before the host, and the host needs to allow in each participant
- You can now enable pre-event registration and then only those people who have registered can attend the meeting
- Screen sharing for participants is automatically disabled – you can override this and turn it back on in the meeting settings
- Private chat is automatically disabled – group chat is still enabled
You can find out more here: https://support.zoom.us/hc/en-us/articles/360041408732
In Meeting Security and Controls
- Lock the Meeting: In the participants pop-up box, you will see a button that says Lock Meeting. When you lock the meeting, no new participants can join, even if they have the meeting ID and password.
- Expel a Participant: still in that participants menu, you can mouse over a participant’s name, and several options will appear, including Remove. Click that to kick a participant out of the meeting. They can’t get back in if you then click Lock Meeting.
- Prevent Participants from Screen Sharing: In the host controls, click the arrow next to Share Screen and click Advanced Sharing Options. Under “Who can share?” choose “Only Host” and close the window.
- Attendee On-Hold: if you need a private moment, you can put attendees on-hold. The attendee’s video and audio connections will be disabled momentarily. Click on the attendee’s video thumbnail and select Start Attendee On-Hold to activate this feature.
- Disabling Video: Instructors can turn participant video off and request to start participant video. This will allow instructors to block unwanted, distracting or inappropriate gestures on video.
- Mute participants or Mute All: Instructors can turn mute / unmute participants or all. This will allow instructors to block unwanted, distracting or inappropriate noise from the meeting.
6. Good practice in running meetings
The challenge, even with videos, is to ensure that all voices are heard and that where possible people don’t talk over e ach other. Some ideas to help with this:
- Where possible, participants need to be using their own device and in a separate room. If two people are sat next to each other, you can get a lot of interference as both devices pick up the sound. If two people need to be in the same room, try and encourage them to use headphone sets.
- Allow 5 minutes for everyone to get into the meeting before starting.
- Where possible, have someone other than the host/chair monitoring the chat for questions or comments.
- Encourage participants to mute themselves when not speaking as this helps with issues around background noise.
- The presenter should make sure their mobile phone is on silent, and any computer notifications are turned off, so not to disrupt the call.
- Where possible ask everyone to have their video on – it can be quite tricky if some people aren’t visible and others are.
- If a participant has a poor internet connection, ask them to turn off their video. They can still contribute via the hand signals, chat and audio.
- Make use of the interactive features.
- Have regular check-ins to give people opportunity to ask questions or make a contribution.
Last updated 15th September 2021