


Your computer can play music CDs and DVDs and, if it’s powerful enough, can show films and TV programmes on disc. You can also buy new computer programs on disc or put blank discs into your computer to do things like copying photos, documents or music. (If you're reading this in 2022 it may be that your computer/Laptop no longer has a slot for a CD if you can't find one..)
CDs and DVDs are played within optical disc drives that come as part of a computer. There are two types of these drives:
- readers – these only read from the discs
- writers (also known as recorders or burners) – these can copy data on to discs.
Many drives are reader-only, but writers are usually only available in combination with readers.
It can take a bit of detective work to figure out how to play a CD or DVD.
Follow these step-by-step instructions on how to put a CD or DVD into your computer
Step 1: First, you need to discover what sort of disc drive(s) you’ve got.
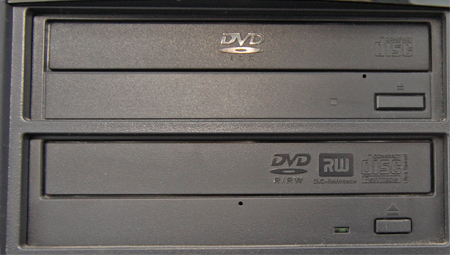
The PC above has two drives: a DVD reader at the top, and a combined DVD/CD reader/writer underneath. These are actually drawer-like trays, into which a DVD or CD is laid and then the tray is closed.
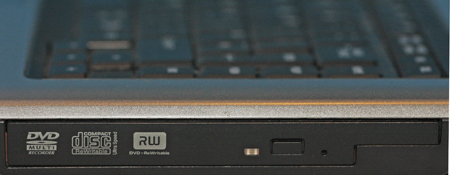
The laptop above has a combined DVD/CD reader/writer on the side of the keyboard.
All-in-one and touch-screen computers often have a drive in one side, immediately behind the screen.
It’s also possible that access to the drive is only a slot. If this is the case, as it is in Apple iMac computers and iBook laptops, just gently feed in the disc and the computer will take it.
Step 2: Now you need to find out how to open your disc drive. This is normally done with the push of a button.
In the PC (right), the ‘open’ (or ‘eject’) buttons are underneath the tray. 
 In the laptop (left), the button is actually on the tray.
Press the button on your computer. If the tray is motorised, it will open completely. If not, it will open slightly and you can gently pull it open.
Step 3: Put your disc into your computer’s disc drive:

The tray is ‘indented’ so that the disc sits in it.
Which side of the disc is uppermost is important. The side that has writing on it should be facing up. If you have a computer with a slot drive, you should first position the disc so that the written side is facing you and then push it in gently.
Step 4: If the tray is motorised, press the button again and it will close. Don’t push it in manually – you could break it. However, if it isn’t motorised, press the tray gently until it clicks shut.
Step 5: An icon of the CD/DVD will appear on your computer desktop. At the same, you’ll see a menu asking you what you want to do with the disc.
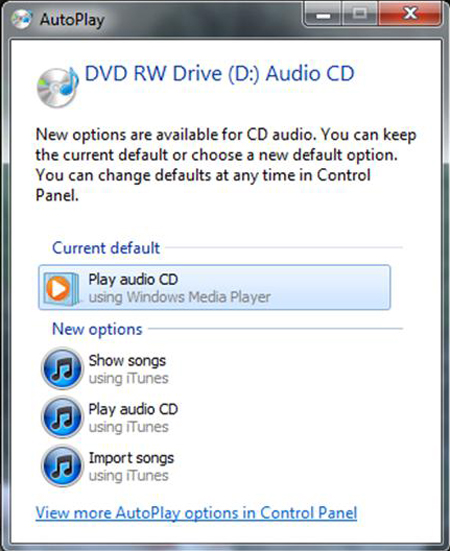
The above menu appeared when an audio CD was put into a PC using Windows 7. If it had been a DVD or a computer program disc, a similar menu would have appeared. Once you’ve made your choice, the appropriate software will come into action to play the music, allow the film to be shown, launch the computer program or whatever.
Step 6: To eject the disc, close the software that you’ve been using with the CD/DVD. Then drag the CD/DVD icon to the ‘Recycle Bin’. This should cause the tray to open automatically if the drive is motorised so that you can remove the CD/DVD. If it’s not motorised, gently pull it open.
Don’t try to remove the CD/DVD from the tray without first getting rid of the icon from the screen – otherwise you could damage your computer.
Done!
Last updated 6 June 2022