


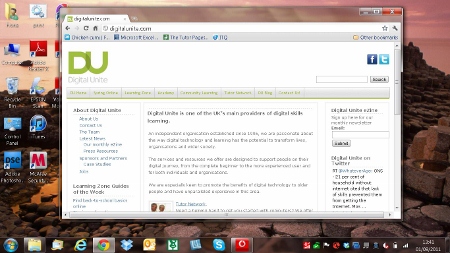
A screenshot (also sometimes called a ‘screen grab’, ‘screen dump’ or ‘capture’) is a bit like taking a photograph of whatever is currently on your screen, which could be a website, a window or just the desktop. The image can then be pasted into a word-processed document.
This guide is for Word 2010 but any similar program can be used.
You’ll need:
- a computer with Microsoft Word installed.
Follow these step-by-step instructions to take a screenshot and place it in a Word document
Step 1: Unless you’re taking a screenshot of just your desktop, make sure that the window you want to include in your screenshot is open.
Step 2: Press the ‘Print screen’ key: Prt Sc or PrtScn. This is usually on the top row of the keyboard. When you press this, you’ll be taking a screenshot of the desktop. On some laptop keyboards, if the Prt Sc text is on the top line of a button, you will need to press and hold the Shift key and then press Prt Sc.
Step 3: Immediately open a new Word document and click the ‘Paste’ icon, or hold down Ctrl on the keyboard and press V. Your screenshot will now appear as an image in your document.
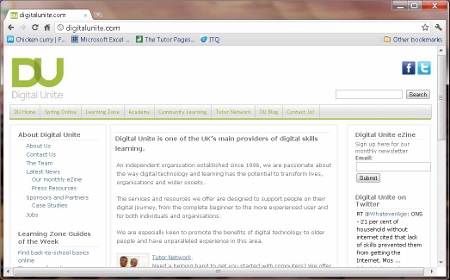
Step 4: You can also take a screenshot of just the active window. To do this, hold down Alt while you press Prt Sc or PrtScn.
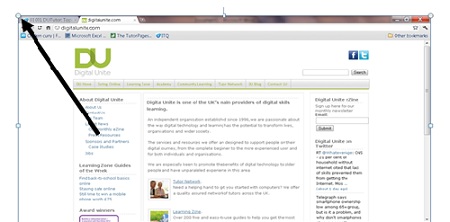
Step 5: You can resize your screenshot. Click on it and a frame will appear around the outside with small ‘handles’ on the corners and sides. You can change the size of the image by dragging on one or more of these handles with your mouse, making sure that the left mouse button is pressed down.
Step 6: Your screenshot can be treated the same as any other inserted image. When you click on it, two new ‘picture tools’ tabs will appear in the ‘ribbon’. These give you a number of formatting options, such as cropping and special effects.

Fiona Syrett is a Digital Unite tutor.
Last updated 15 June 2022