


So you’ve bought a brand new iPhone and want to connect your email account? Thankfully, Apple has made it a relatively simple and pain free task, but here’s our step-by-step guide just to make sure you get everything set up exactly how you want it.
You’ll need:
- An Apple iPhone
- An email account
NB: This guide was written for an iPhone 4 and 5, however the process is very similar for all iPhones.
Follow these step-by-step instructions to set-up your email on your iPhone
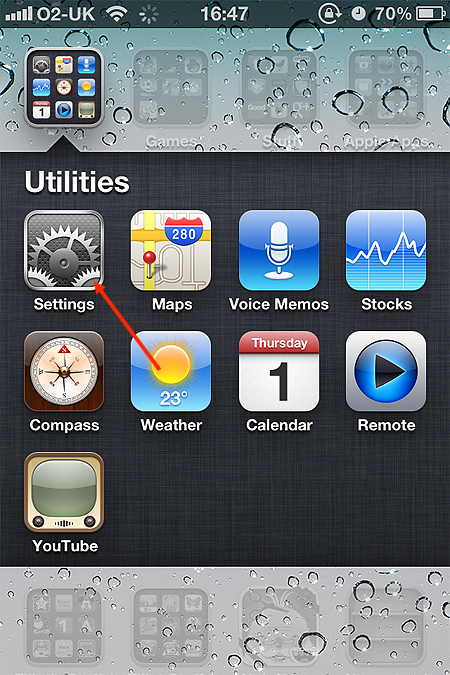
Step 1: Tap the Settings app on your iPhone screen.
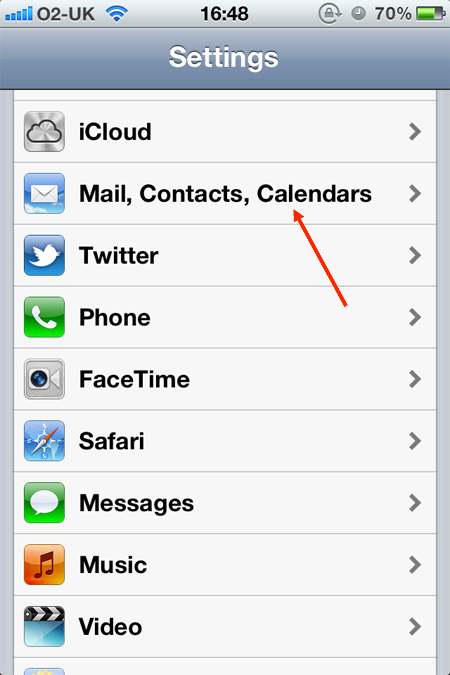
Step 2: Scroll down and tap Mail, Contacts, Calendars.
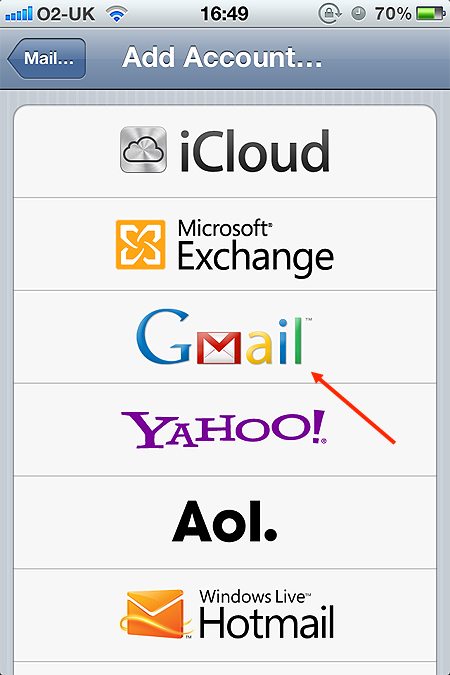
Step 3: Tap Add Account...

Step 4: You will now be taken to a screen with a number of email provider logos on it. Tap the name of the company who provides your email service. For this tutorial, we will set up a Gmail account.
Step 5: A page with an empty form will appear. Fill in the empty text fields with your name, your email address (XXXXXX@gmail.com, in this example) and your email account password.
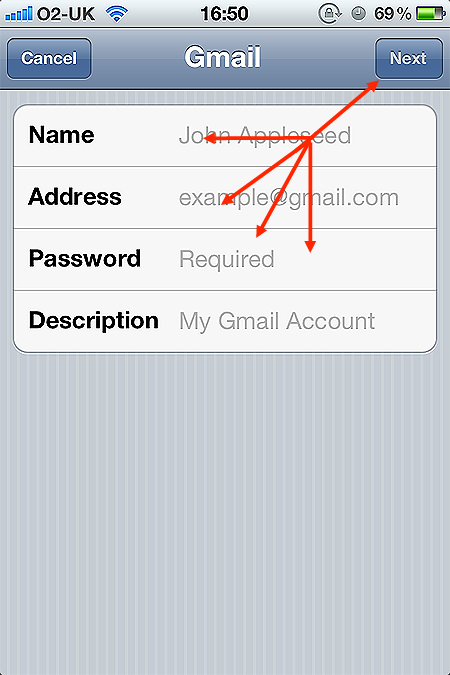
The Description field will automatically default to your email address, but you can change this to something more descriptive, like My Gmail, for example. Press the ‘Next’ button in the top right-hand corner of your iPhone screen when you have entered all of your information.
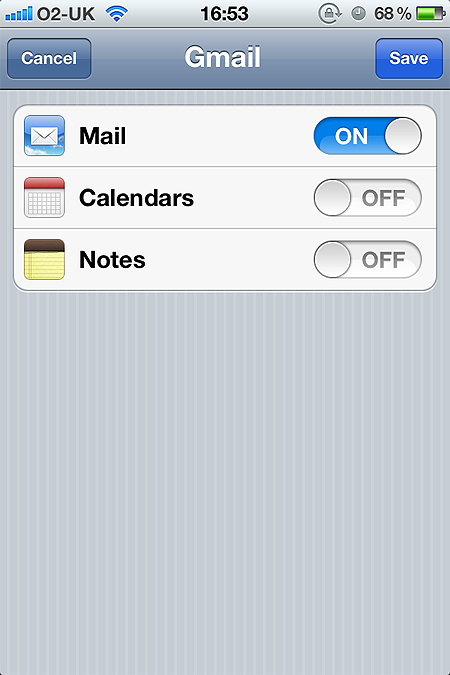
Step 6: As well as connecting, or syncing, your mail, you can now also choose to add your Google Calendar and Notes. Slide the toggle switch to ‘ON’ for any service you would like to access on your phone and tap Save in the top right-hand corner of your iPhone screen.
And you’re done. Just tap the Mail icon on your iPhone homescreen and you will be able to read and write emails from the account you just connected.