


Sometimes you’ll have something on your computer that you’d like to play on your television. Maybe you’ve downloaded a film or you’ve been sent a video showing members of your family that you’d like to watch on a bigger screen, perhaps with others.
A modern television can now be connected to a desktop or laptop computer. That way, your computer becomes a playback device, with the TV acting as a monitor. Using an HDMI (high-definition multimedia interface) cable is the easiest way to do this.
Note: These cables range hugely in price. However, experts agree that there’s nothing to be gained by buying a more expensive ‘designer’ cable – a relatively cheap one should do the job adequately.
You’ll need:
- a computer with an HDMI ‘out’ socket, a sound card and a video card
- a TV with an HDMI input socket
- an HDMI cable to connect the two.
Follow these step-by-step instructions to connect your computer to your television
Step 1: Place your laptop near the television or ensure that your desktop computer is located close enough to reach it via the HDMI cable. Make sure that both your computer and your TV are turned off.
 Step 2: At the back of your computer is an HDMI socket (see right). It looks a bit like a USB socket but isn’t rectangular. It will be labelled ‘HDMI’.
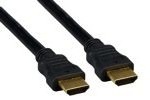 The HDMI cable is the same at each end (see left). It doesn’t matter which end you plug into your computer. Plug one end in now.
Step 3: There’s a flap on the front or side of your TV or on the back near the power cable. Under it, you’ll find all sorts of buttons and input sockets. Plug the other end of the HDMI cable into the TV via the HDMI socket you’ll find under the flap.
Step 4: Turn on your TV. Use the ‘AV’ button on the remote control to select the AV input ‘PC’.
Step 5: Turn on your computer. It will now carry out a ‘handshake protocol’ with your TV. Your TV will feed information to the computer about the format it needs in order to accept video. You should see the information from your computer appearing on your TV screen. You may need to agree a couple of changes on your computer. Use your mouse or touchpad to click on the buttons in the usual way.
Step 6: Your TV is now your computer screen. Make sure you select the ‘Full screen’ option on your computer.
Step 7: Start the film you want to watch. Move the mouse pointer off the screen so that the ‘Play’ and ‘Pause’ buttons don’t clutter it up. But don’t worry – if you move the mouse again, they’ll reappear.
Step 8: When the film has finished, close the file that contained the film or video and shut down your computer. Unplug the HDMI cable and select a different input on your TV’s ‘AV’ button.
Follow these steps to connect a laptop to your TV wirelessly
You’ll need:
- a laptop with Wi-Fi connected
- A Wi-Fi enabled TV
Step 1: Turn on the TV and Computer.
Step 2: From the TV menu enable the Wi-Fi mode.
Step 3: Select the Wi-Fi input on the TV as you would Video 1, DVR, etc.
Step 4: On the PC, you should be prompted to select the Wi-Fi connection to the TV. Some PC manufactures (notably Sony) have a dedicated button on their laptops to activate this connection.
Step 5: Follow the TV manufacturer’s instructions on how to link the TV with your Wi-Fi network. It may be necessary to enter the security key or password to allow your network to recognize the TV as an access point (a re-boot of the network router may be necessary).
Step 6: The TV may display a four-digit passcode for you to enter on the PC.
Step 7: The PC should then recognize the TV as a device connection
Step 8: Even with the correct input selected on the TV, you may not see a picture. If so, go to the PC’s Control Panel and select “Adjust screen resolution.”
Step 9: You will see images for two different displays. Click on display number 2.
Step 10: Now choose “Extend the desktop onto this monitor” and Click “Apply.”
Step 11: The HDTV screen should now show the Windows desktop photo. If prompted, click “Keep display settings.”
Step 12: You may need to adjust the resolution to get a larger image on the TV.
Step 13: Open windows on the PC screen may need to be dragged to the TV.
Step 14: You should be set, but be warned that Wi-Fi networks can be finicky when it comes to adding devices or making changes.
There you go cable-free streaming!
Note: Mac users will have a similar multi-screen set-up procedure through System Preferences/Displays/Arrangement/Display, to either extend the desktop to two screens, or ‘Mirror’ exactly what’s on the computer onto the TV.
Siobhan O’Neill is an experienced freelance writer living in Surrey.