


Your computer mouse lets you move the cursor (pointer) round the screen and then ‘click’ to start a program or begin writing in a particular place or open a menu to see what choices you have. All desktop computers come with a mouse, and you can use one on a laptop if you don’t like the touchpad that’s built into it.
Invented in 1963 by Douglas Engelbart, the computer mouse has developed over the years and now comes in a variety of designs. It’s called ‘mouse’ because it has a basic mouse shape and the cable that attaches it to the computer looks like a tail. When referring to the device in the plural, both ‘mice’ and ‘mouses’ are acceptable, according to the Oxford English Dictionary.
Mice were first made with two gear wheels to define direction and then with a ‘trackball’, all of which moved in contact with a surface. Today optical mice that use light to detect direction are more common. Mice can also be cordless, making them easier to move.
Follow these step-by-step instructions to help you get to know your mouse
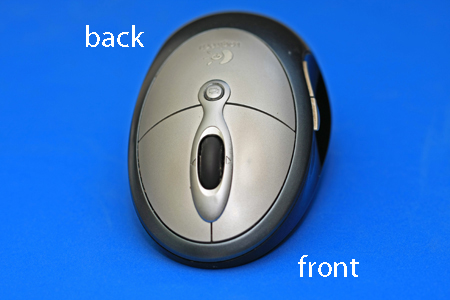
Step 1: Pick up your mouse and have a look at it.

At the front (which points away from you), there are two buttons – left and right. You press or, more correctly, ‘click’ these to make things happen.
Most mice also have a wheel in between the buttons that you roll to move up and down the screen – technically called ‘scrolling’.
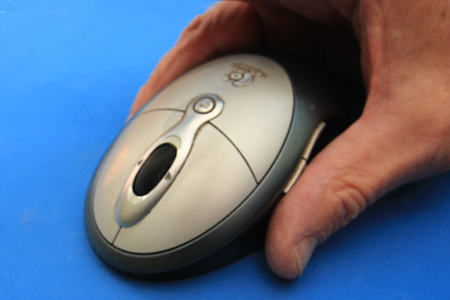
Step 2: Learn to hold your mouse comfortably. It’s normally held between your thumb and little finger like this:
Step 3: Have a click. Use your index finger to click the left button and your middle finger to click the right button:
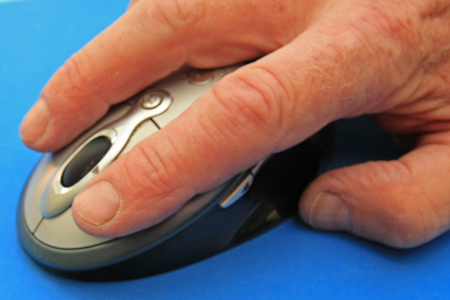
If you’re left-handed, you can use the opposite fingers. However, you can also usually change the preferences on your computer to swap which buttons do what.
Step 4: Try a double-click. This is done quite often on the left button. You have to click twice, as quickly as possible. The first click tells the computer that you are in a particular ‘window’, and the second click tells it that you’re selecting a button or link or whatever to do something in that window. If you click too slowly, the computer just thinks you’re telling it where you are again and again, so do click quickly.
Step 5: It’s time to practise. You’ll find some simple mouse exercises on the PCP Library website. To reach them from here, place the cursor over the highlighted ‘simple mouse exercises’ above – this is known as a ‘link’ – and click the left button. Did you notice how the cursor turned into a little hand when it was over the link? That tells you that you can click on that word or phrase to go somewhere else on that website or on the internet as a whole.
Step 6: Now try a right-click. Just click the right button, paying no attention where the cursor is on the screen. A menu will appear, giving you options. Whenever you right-click, it opens a menu. If you move your cursor off the menu and left-click, the menu will close.
In other Digital Unite guides, you’ll often be told to ‘click’ and sometimes to ‘double-click’ or even ‘triple-click’. When it says this, it always means that you should use the left button. If you need to ‘right-click’, you’ll always be told to ‘right-click’!
Done!
Stephen Baird-Parker is a qualified ICT teacher.